Thursday, November 1, 2012

Halloween Homemade

I *gasp* make homemade treats at Halloween.  I only offer them to kids who are with thier parents, and ask if it is OK for their child to have a homemade treat.  I have never had someone turn me down.  We can't possibly make enough homemade treats for all the kids who come on Halloween, we have several hundred trick or treaters, but I do make some just the same.
I always make homemade hot cider, too.  It isn't so much about the drink itself, but it is the smell of the cider that makes it seem like Halloween.  I  have an old glass stovetop percolator that I fill with cider and add five or six cinnamon sticks, five or six cloves, and five or six allspice berries to it.  Once it comes to a simmer, I turn it down on low and leave it on the simmer burner.  It is a wonderful welcoming smell for our visitors.
We made Grandma Jenny's caramel corn this year.  It is a simple brown sugar caramel poured over popped corn.  I added some dried fruits and nuts, and we packaged it in zip lock bags and put a glow in the dark Halloween sticker on it.

Grandma Jenny's Caramel Corn
2 C packed brown sugar
1/2 C water
2 T oil (I used grapeseed oil, but any light oil would do)
Combine all three ingredients in a large saucepan.  Don't stir, just put on high heat until it boils.  Let the mixture boil for fifteen minutes on high heat, and then pour over corn.  Spread out onto nonstick baking sheets to cool and add dried cranberries and pumpkin seeds.  After it cools and hardens, bag it up.  Grandma Jenny said to use it for a large bag of popped corn.  She bought hers already popped, but we popped our own in our Whirlypop.  It is a stovetop popcorn popper that has a crank handle on top to keep the corn stirred while it pops.  It is great fun to use.  I have seen similar models at the Big R store for less than ten dollars.  It sure beats having to buy microwave popcorn, and put up with all the salt and preservatives.
We also made caramel apples.  I haven't made caramel apples in years.  We put one of my glass mixing bowls over a pan of water that was boiling on the stove to heat the caramel.  I ended up adding water to the caramels to get them to a consistency that would coat the apples.  They sort of slumped, and were too sticky to give out to the kids, so Don will end up taking them to share at work.  We had bought some cut little Halloween sprinkles to decorate them in.

Sunday, October 14, 2012


So here it is, my pantry.  Don calls our pantry the vault.  It is a good description, because we have a lot invested in it.  Besides the investment in food that will cost me the same to serve six months from now, as it did the day I grew it or canned it, we have a large investment in time.  Time to provide for ourselves healthy nutritious food with no preservatives or added salt, and time to preserve the traditions that made the homesteader's and pioneers thrive!  It is a proud tradition, and I am proud of the vault.  I have canned more than I ever have in my life this year, and have learned so many new things!
Here is the rest of it.  The dry goods things are stored in another cabinet.  We will have to replace the shelving in the first picture this year.  It isn't big enough for what I want to do, so we will be exploring storage options to get the most use of our small space.

Sunday, October 7, 2012

Making Tomatillo Apple Salsa

I am still cannning like a madwoman trying to get the garden all put by.  Counting down the crops until they are all either in the freezer, or the new dehydrator, or in jars in my pantry.  So here is the process for tomatillo salsa.  Tomatillos are a gooseberry relative, and makes it's contribution to the culinary world mainly as salsa and a sauce called salsa verde that is used in green chile, posole and other Mexican food delights.
I am making both tomatillo salsa and salsa verde today.  The tomatillo salsa is a water bath canning method recipe, and the salsa verde requires a pressure canner, because it contains chicken stock.
When we harvested the four tomatillo plants, we came up with three flats of tomatillos.  To use them, the papery husk must be removed.  Here is a photo of the tomatillos in the sink full of cold water.  Besides being enclosed in a husk, they are sticky little buggers, so water is a must.
 So here they are,  Some of them are dinky, and some didn't fill out their little papery husks, but trust me, they will all be delicious! It takes a little time to get them all ready for using, but they are worth it.  We buy canned tomatillos, and use them for posole mostly.  It is a delicious pork stew with hominy and green chiles.  The tomatillos make a wonderful tangy broth to simmer the meat in.
After you are all done de-husking, you should rinse the fruits in cold water again.  Like I said before, these little buggers are sticky.
For my canning today, I used the recipe from the Better Homes and Gardens' book You Can Can.  It interested me because it added apples to the tomatillo salsa, and I had lots of apples that needed used.  The recipe called for a Granny Smith apple, but I used MacIntosh, because that's what we had on hand.  Here is what they look like when you get them all cleaned.


Pretty huh?   So I used my food processor to pulse/chop the tomatillos.  Also the onions, the jalapenos, and the peppers.  It is just easier, and my chopping thumb is still sore from the tomatoes I canned diced last week!  I am cooking my salsa in the oven in my huge roaster pan.  I am a notorious scorcher, so I am taking no chances of ruining all my hard work. The salsa will come to a boil and simmer in the oven before I can it in the water bath canner.  I have about eighteen pints of salsa in the roaster.  Here's what it looks like, and may I just say, it tastes delicious.


Wednesday, August 22, 2012

Fast food, Country Style


Well, I am still in the canning "weeds" as it were, and am canning almost every single day, if not doing the prep and soaking portions of the canning process.  Besides sixty pounds of tomatoes, today I have a canner load (eight quarts) of chicken stock that I need to do something with.  I can't decide if I want to make: chicken soup or just can the broth.  I am leaning towards the soup, even though it requires more effort and processing time.
A quart of chicken soup is a platform for so much yumminess you can't even imagine!  My husband likes me to add chopped cabbage and ramen noodles (the real noodles, not the soup mix) to it.  The day care babies like it that way too.  I can put dried mushrooms and rice, or frozen tortellini and spinach, or add a C of buttermilk mixed with a couple of T of cornstarch to thicken it, and finish with a C of cream for cream of chicken soup.  I can add tomato paste, roasted green chiles, some roasted garlic and thicken it with masa for a terrific chicken enchilada soup.  It is our fast food of choice, so I guess I'll make more while I can.
That is the wonderful thing about home canning.  I have a whole shelf to choose from full of fast food.  I can pour out a jar of Chicken Cacciatore, and boil some noodles, and have supper in less than twenty minutes.  I can start a gravy in the pan, with butter and flour cooking together, add the liquid from the canned pork loin chops, and some buttermilk to make a killer pork gravy, to which I'll add the pork loin chops in to warm.  Less than fifteen minutes, and I have hot pork sandwiches on the table. In the time it takes to boil the egg noodles, my hamburger stroganoff gets heated and sour cream added for another fast food meal.  There are the ultra fast pea and ham and bean soups, the chicken enchilada soup, the tomato bisque soup, all right there, homemade and seasoned to please our own pallets and accommodate my dietary restrictions.
We bought a new car this last month.  My old Sable was pretty sad.  The paint job that they put on vehicles in the nineties didn't last, and the windshield was going to cost more than the car was worth.  We got a beautiful used Lincoln Town Car, with all the bells and whistles.  We learned a long time ago, that it's better to buy the best used car you can find than to buy new.  I could never have afforded this car new, but it is like new still.  It even smells like a new car inside.  That beautiful smell of new plastic and leather.  I bet no one has worn their poopy chore boots in it ever.  Not that they will get the chance to now either, it is kind of MY car, and hopefully, I'll not be warming any newborn lambs, or hauling feed in it like my last car.  That's what I keep telling myself anyway.
There is great joy in driving a big Lincoln.  It is like riding a marshmallow down the road.  It has dual controls for the air conditioning, which should improve my marriage.  The only thing we really ever fight over is the temperature.  I'm a hot momma, and Don is always cold.  He actually wears a t shirt under his shirt 365 days a year!  He says it causes evaporative cooling in the summer.

Tuesday, August 7, 2012

No Salt No Sugar Bread and Butter Pickles

I do a lot of home canning, but this is a project everyone can try.  It is a project for the fridge, so there is no canning involved.  It does help, however, if you have a canning jar to pack them into, but it is certainly ok to use another similar sized vessel.
I just harvested the first of the cucumbers from my garden, and this is how I used them.  We have had to do several things to prevent the deer from eating our plants and fruit.  The last of which was an electric fence around the top of the fence.  It seems to be working so far, so maybe I'll actually get a harvest out of all my labors!


You will note, the jar is not totally full of pickles.  We had some quality control checks before I took the picture.


No Salt No Sugar Bread and Butter Pickles
for the fridge

5-6 pickling cucumbers, sliced in 1/4 inch rounds
2 C white vinegar
11/2 C stevia in the raw
1/4 tsp turmeric
1/4 tsp celery seeds
1/4 tsp mustard seeds
pinch of red pepper flakes, or a squirt or two of tabasco
1/4 tsp pickle crisp

Slice cucumbers and pack into a quart jar. Add pickle crisp to the jar. In a small saucepan, heat the vinegar, stevia, turmeric, celery, mustard, and red pepper flakes until boiling. Pour over pickles. Remove bubbles by running a chopstick down into the jar to release them. Let cool. Refrigerate for 48 hours, or until colored all the way through.
These pickles have 2 calories per serving, for six or seven pickles, and one g carb, no fat and no protien.

Thursday, July 26, 2012

Blueberry Apple Pie


I love to make pie.  We recently had some nice blueberries for pie, and when I went to make it,  the two clamshells of berries just didn't look like enough to make a properly filled pie.  My definition of properly filled is so much filling you couldn't cram another berry in there.  So, I peeled the three Granny Smith apples that were in the fruit bowl and added them too.  It turned out really good, and I got requests to make it that way again soon!
When I was putting this together, I got distracted a few times.  Because of my distracted state, I forgot to put the butter pats over the fruit before putting on the top crust.  I remembered about the time I got it all crimped.  So this accounts for the gaping hole in the top.  Actually, it worked out well;  I got the butter put in the gaping hole, and it didn't drool all over my oven because the hole prevented it from doing that too!
I used store bought crust.  The last homemade crust I did was an all butter thing, and it was tough as shoe leather, so why reinvent the wheel?  I went back to what works.

Blueberry Apple Pie
2 pints fresh blueberries
3 Granny Smith apples peeled and sliced thinly
1 tsp cinnamon
1 C sugar
1/4 C flour
1/2 stick butter cut into little pieces and dotted over the pie (hopefully before you put the top crust on hehe)

Mix above ingredients.  Pour into bottom pie crust, and top with top crust.  Wet the edge of the bottom crust, and crimp to seal.  Decorate the top with a couple slashes, and a fork to release steam.  Place filled pie on a cookie sheet lined with foil  (I forgot the foil last time and had to buy a new cookie sheet.  After an hour, the burnt fruit syrup is not going to come off!  Bake at 400*F for an hour.

Sunday, July 22, 2012

My Grandma's Plums


I canned plums today.  It is a trip into my childhood and food is the vehicle that takes me there.
My Grandparents were homesteaders on Buckhorn Flatts near Riverton Wyoming.  They ran some cattle, raised sugarbeets, ran the beet dump, and had a dairy.  When I was little, I loved to be at Pappa Hinkle's house.  The men would come into Grandma's kitchen after milking, and have coffee.  They ate their lunch around that table, and talked of all things.  There was humor and love always in that house.  We ate cottage cheese with syrup, and tomatoes with sugar sprinkled on them, and these wonderful canned plums.  Sitting there next to the white built in china cabinet, and looking out the window that overlooked  the chicken house, which I had a fascination for, I always felt at home and content.
I loved my Grandmother's canned plums.  Their tart and tangy sweetness is just one of those things that tastes like nothing else. The smell of the syrup alone is one of those things that makes you pause, and inhale deeply, exhaling with the word Aaaahhhh.  They should be served ice cold, or thickened in a pie.
Now that I am grown and can my own fruit, I find that plums are my favorite to can.  They are so simple.  Just cut them in half and pour over a light syrup made from 8 C water, and 2 C sugar boiled together.  Then process in a boiling water bath for twenty minutes for pints like these pictured above, or 25 minutes for quarts. No treating with fruit fresh, or peeling off skins, just plunk them in the jars and away we go!

Thursday, July 12, 2012

Jalapeno Cranberry Poppers with Bacon

Note the pie in the background:  Apple blueberry pie.  Look for it in the next post!

My little kids all went home yesterday before five, but I had two meals worth of dishes to get cleaned up before supper.  I just had one of those days when you know if you head to the kitchen to wash dishes while the kids are playing there is going to be trouble!  It is an understatement to say that the natives were restless yesterday.  They had been on holiday the week before, so it takes a few days to get back in the groove again of getting along with others, and following Tina's rules.
I was surprisingly in good shape at the end of the workday, though, and had a good visit with my husband as I cleaned up the mess, and put the chicken in the marinade for the grill.  He decided to go ride his colt at the farm lease, so I had a pocket of time before I had to have the meal on the table.
It is just a pleasure at times to cook a meal without being hurried along.  The temperature had cooled considerably, and I started pulling out vegetables and fruits to make a plan.  I had chicken thighs ready, and put them in a zip lock bag with 1/2 cup fresh lemon juice, and a packet of Weber's Just Add Juice marinade (which is delicious by the way).  I had white potatoes to use up, and planned to make mashed potatoes to go along with the grilled chicken.  Past that, I really didn't have a plan, and because it is coming up on my shopping day, I really need to use some things up.
I found a good bunch of jalapenos that needed used up.  They were left over from making pickled vegetables.  We like poppers, but make baked ones instead of frying them.  In this recipe, the health benefits of doing that are negated by the addition of a big ole piece of bacon on top, but they are a special treat.  The play of the sweet and tangy cheese and cranberries against the hot pepper and the salty bacon is heavenly.

Jalapeno Cranberry Poppers with Bacon

10-12 jalapenos halved longways, seeds and ribs removed
1/2 C ricotta cheese
1/2 C cream cheese
1 C chopped dried cranberries
Bacon cut into jalapeno sized lengths
Fresh ground pepper

In a medium sized bowl, combine the cheeses and chopped cranberries.  Fill jalapeno halves level, and place them on a cooling rack placed in a baking sheet.  Top with a piece of bacon, and season with fresh ground black pepper.  Bake at 450*F until bacon is crispy and peppers are soft, about twenty minutes at my altitude.  Serve either warm or at room temperature.

Tuesday, May 29, 2012

Fennel and Orange Slaw with Mint

We ate at the Chinese Restaurant last week, and they had a Cambodian coleslaw type salad on the buffet.  It had leaves of mint in it, and was surprisingly delicious.  I had never thought to pair cabbage with mint before.
We have been eating lots of fresh fruits and vegetables lately.  We adore fennel, and when we can get good fresh fennel, we buy it up to make poached fish, or to put into soups.
If you have never had fresh fennel bulb, you are in for a treat.  It is similar to celery in texture, but has a mild licorice flavor to it.  It is great fresh, or roasted, or in soups.  The fronds are pretty, and although I doubt that they add much in the way of nutrition, I always chop up a few and add them in any fennel dish.
We are avid participators in the Bountiful Basket program.  It is a volunteer food cooperative, and offers fresh food at low prices.  We just got our Bountiful Basket for the week, so I needed to make room for all the new fresh goodies that came in our basket, I scoured through my full bins for things to use up, and this is the salad that was created, in honor of that delicious Cambodian slaw.

Fennel and Orange Slaw

3 fennel bulbs, cored and sliced thinly
3 oranges, royaled*
1 English cucumber sliced
1/4 C fresh mint leaves
reserved orange juice
1 tsp red wine vinegar
1 tsp olive oil
fennel fronds for garnish

Cut the fronds and core end off of the fennel bulb, and cut it in half lengthwise.  Cut out the tough core, and slice in half moon shaped thin slices, and place in a large salad bowl.  Add all remaining ingredients and toss to coat.  Season with salt and pepper to taste.  This is great served with roasted pork, or would be an awesome picnic salad.  It's very fresh, and low calorie.
*A royaled orange:  Cut both ends off of an unpeeled orange.  Then standing the orange on the cut surface, you can remove the peel and pith from the orange.  With a paring knife, cut the orange slices out keeping close to the membranes.  When all the slices are liberated, squeeze the orange juice out of the orange "guts" and into a bowl to use for the dressing.
Royaling fruit is a great method.  I use it to add citrus to salads. If the citrus in my fruit bowl on the kitchen table starts to look a little soft, I will royal all the fruit, and put it and the juice into a canning jars to put in the fridge.  It's amazing how quickly that cold fruit gets used up once I do that!


Friday, May 25, 2012

Making Chicken Stock Second Method

If you've read my blog before, you know that I use rotisserie chicken from the store often.  I figure if they can roast it for me for the same price as a raw chicken, I will let them.  I will let you in on another little secret:  I have an aversion to raw poultry.  It grosses me out!  I hate the smell, and the feel of it.  I really hate it when it's not cleaned good, and you have to pull the pin feathers, or clean leftover guts out of the body cavity.  I have a hard time eating chicken after handling it raw, it just bothers me.  So, I buy it warm and roasted and smelling delicious from the store.  There, I've admitted it!
After I pick all the meat off of the chicken, I put the skin and bones in a zip lock bag, and it goes in my freezer.  That way, when it is a cold day, or I am bored, I can pull it out and make stock.  I had three bags full of chicken bones, and I put them in my big 15 quart stock pot.  I filled it up to about two thirds, and added a handful of black peppercorns, and about 5 small bay leaves.  Because the chicken was seasoned before being roasted, this will have a slightly different flavor than the stock I made in the previous post. It is made from roasted meat, so it will have a darker color than stock made from poached chicken.
I clamp a lid on the pot, and put it on my simmer burner to cook there all day.  It takes all day to get it to that fall apart stage, where the meat and gelatin have all been gleaned from the bones and skin.  After it is done to that stage, I pour it through a colander into another huge stock pot.  All of the bones and skin and little bits of meat have given their all to the stock, and along with the peppercorns and bay leaves, it goes in the trash.  Now I have a huge pot of stock at my disposal.  I usually put it into canning jars, leaving 1 1/2 to 2 inch headspace, and just freeze it using a plastic lid made to fit canning jars.  I am at a limit to my freezer space, so this time I will can it.
When canning any low acid food, such as meat stock, you need to use a pressure canner.  Be sure to follow the directions from the manufacturer of your canner, and use the recipe guidelines from a reliable source, such as Ball Blue Book, or Kerr Canning Guides.  You can get recipes online, but be aware that not all sources are reliable.
So, I used the parts that would have gotten thrown away normally, and made seven glorious jars of stock.  It is more flavorful than the stock in a box, and if you figure in the cost of the seasoning, and the jar lid, it still costs only pennies to make!

Wednesday, May 23, 2012

Canning Chicken, Making Chicken Stock I

Chicken has been an incredible value this week.  I found chicken breast for $.99 and I stocked up on leg quarters for $.89 a month or so ago.  In the next few posts, I will show three different methods for making chicken stock, and soup.  I am making a chicken soup base today, but I will also be making a Chicken Cacciatore, and possibly a White Chicken Chili if I have enough chicken and stock.
Now, I know that chicken stock is readily available, and of high quality, but it is extremely easy to make your own, and costs just pennies a jar.  Once you start making your own, you'll never go back to store bought.  There is a depth of flavor, that you just can't buy in a box.
I recently got a new 8 quart pressure canner/cooker, and the method I'm showing you today is made easier by using my pressure cooker to make the stock.  I could most certainly make it by simmering it slowly all day in a stock pot, and I'll show you that method next time, but it took less than an hour to get the chicken to that fall apart state needed for stock making.  I'll be using this method far more often than the cooking all day one to be sure.
I make my stock using no added salt, but you could certainly use salt in yours.  Just be sure if you plan on canning the stock instead of freezing it that you use canning and pickling salt, not table salt.  Iodized salt and canning don't mix.
So I started this batch of Chicken Soup Base with a package of leg quarters.  The dark meat in legs and thighs makes a superior stock in my opinion, but I also make stock from breasts.  The color will be a lighter lemon yellow versus a more orange brown that you get from the dark meat.
This package of meat was 5 pounds, and it was $.89/pound.  I had purchased it a while back, and stored it in the freezer for stock making day.
After browning the leg quarters well in a couple T of olive oil, I removed the chicken and placed the jar rack back in the cooker with the chicken on top of it.  This elevates the meat, while still circulating the liquid, and keeps the chicken from sticking to the bottom of the pot.  Then I added 6 quarts of water, a handful of peppercorns, and about four small bay leaves.  That is all.  You will be amazed at the flavor this will render.  This processed for 35 minutes at 10 pounds of  pressure.    I let the cooker sit for five minutes off of the heat, and then ran cold water over it in the sink, and removed the weighted gauge before opening it.  Note that this method is only used when cooking in the pressure cooker, and never when it is being used as a canner.
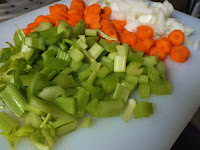
Now it is just a matter of picking the meat off of the chicken, and straining the stock.  To the hot clean jars, I added carrots onions and celery, along with the meat from the leg quarters.  I don't fill the jars more than half way, so that there is plenty of stock to cook homemade noodles, or spaetzle, or dumplings in when I heat it up to serve it.
While I was filling the jars, I have a stockpot full of the chicken stock on to boil, and I've added the proper amount of water to my pressure canner, and the jar rack, and have that on the stove also.  I have put my lids and rings together, and they are waiting in hot water for when I need them.  If the lids are kept hot, the rubber will have a better chance to seal. I'll drain off the water at the last minute, and have them handy.
Now the chicken stock is boiling, I take great care to ladle the hot broth into the jars, leaving a 1 inch headspace.  After the jars sit for a couple minutes, I will skim off the fat at the top, and add enough broth to come up to the 1 inch headspace amount again.  With a clean towel that has been soaked in hot water and a little vinegar and rung out, I carefully wipe the rims of the jars, and place the lids and rings on.  Working with a towel over my hand, because the jars are extremely hot, I screw the lids down tight and carefully place them down in the pressure canner.  The canner lid goes on and the weight, and they process for 1 hour and 30 minutes at 15 pounds of pressure.  After processing, I will let the canner come back to normal pressure before I remove the weight, and set them on a towel to cool.  I like to remove the rings and wash the jars after pressure processing.  They leak a small amount of liquid, and should be cleaned before storage.
I prefer to store the rings back on the jar.  I am careful to place them on loosely, so I don't disturb the seal of the jar.  I don't like to have to keep all those rings elsewhere, and I feel it helps protect the jar rim if it should get bumped around.  Once they are chipped, they are no good for canning.
So, here is the finished product.  The package of three leg quarters made 8 quarts of chicken soup base. Figuring in the vegetables and the herbs and spices, and also the lids, it still only comes to $.89 cents a quart jar.  It is so worth the time and effort!


Snap Pea Salad
Snap Peas were a good value at the store this week. Also vine ripened tomatoes, so I made this fresh salad for lunch today:
1 C Snap Peas cut in half

3 vine ripened tomatoes cut in wedges
1 C Carrots peeled and sliced on the mandolin 
1/2 Red Onion sliced thin
1/2 C Feta Cheese
1/4 C Red Wine Vinegar
1/2 t Mrs. Dash onion and herb seasoning
1/8 t tajin seasoning
drizzle olive oil
you can find tajin seasoning in the produce section, it is a latin flavoring for fruit, and adds a tangy citrus flavor.


Monday, May 21, 2012

Turkey International: Hungarian Turkey and Cabbage Casserole, Dutch Turkey Waldorf Salad


It is a challenge to come up with new recipes for turkey, as we eat it often due to my dietary restrictions.  You can only eat so many plain turkey sandwiches before it becomes boring.  If it were colder out, I would get out a whole turkey from the freezer.  I stockpiled several last Thanksgiving time.  The thought of roasting a whole bird for most of a morning in my already hot kitchen is almost more than I can stand.  So, I rely on the roasted turkey breast that they sell in our local grocery store.  I carefully pull the whole breast off the bones, and put the bones and bits of meat still clinging on,  along with the skin, in a stockpot to boil away while I finish the rest of my turbo cooking for the week. 
I deli slice half of one whole breast for sandwiches, and put it in a tupperware in the meat drawer.  I will add a couple teaspoons of the broth made from the bones to the meat to make sure it makes a moist  and tender meat sandwich.  This is a good tip for any kind of roasted meat that you are going to use for sandwiches.  The other half gets diced for the Hungarian Turkey and Cabbage Casserole.  The other breast gets divided: 4 cups get diced for the Waldorf Salad, and the rest shredded to make homemade turkey and noodles on Thursday.
So, for my twelve dollars of already prepared meat, I have four meals plus leftovers.  Three dollars a meal!  Not a bad meat choice for our tight budget.
We love cabbage in any preparation in our house, either cooked or raw, or as sauerkraut.  This is a variation on a traditional Hungarian side dish.  It is simply shredded cabbage cooked in butter and added to cooked noodles.  I have adapted it to include mushrooms and onions and leftover meat.  It is good with turkey, but you could also use diced beef roast, or pork.

Hungarian Turkey and Cabbage Casserole
6 T butter divided
1 diced onion
2 C mushrooms sliced
1/2 head shredded cabbage
1 qt/box chicken or turkey stock
1 C diced turkey
1 tsp caraway seeds
1 C milk
2 T cornstarch
Salt and Pepper to taste
1 box cooked and drained short cut pasta like shells

In a large dutch oven or chicken cooker skillet, sweat the onion and mushrooms until onions are translucent in 3 T butter.  Add shredded cabbage, and stir until it starts to wilt.  Add caraway and stock.  Bring to a boil.  Season to taste with salt and pepper.  In a measuring cup blend the milk with the cornstarch until it is dissolved.  Stir into boiling stock until it thickens.  Stir in the remaining 3 T butter to finish the sauce, and pour over cooked pasta.
At this point, you can cool and store it to heat in the oven later in the week at 350*F until bubbly. 

Turkey makes a wonderful Waldorf type salad.  I use apples and dried fruits and toasted nuts in it.  My daycare kids love it.

Turkey Waldorf Salad
4 C diced turkey
1/2 minced onion
1 C celery diced
1/2 C chopped dried cherries
2 apples cored and chopped (anything you like, I used a tart pink lady apple)
1/4 C chopped toasted nuts

Toss all ingredients in a large bowl, and top with dressing:
juice and zest from 1 lemon
1/2 C Greek yogurt
1/4 C orange juice
1/2 T orange zest
1 tsp sugar or stevia, or to taste
1/2 tsp cardamom


Thursday, May 10, 2012

Mexican Style Pickled Vegetables

We love the flavor of cumin seeds.  This is a hotter version of pickled vegetables.  I have slices of jalapenos in it, and a more spicy pickle than the plain Italian kind.  It will need to sit on the shelf a good six months to fully develop it's deliciousness.  Super easy, it's a boiling water bath canning project.
I cut up the vegetables after work, and then stored them in a covered container until nap time this morning.  While the girls are sleeping, I made the brine, filled the jars with vegetables and spices, and processed it.  I have enough for another canner load of it, but will save that until tomorrow.  I have more carrots, onions and chilis left, so I'll add another head of cauliflower to make it enough for a whole load.  The vegetables will be fine covered in the fridge until then.

Mexican Style Pickled Vegetables
2 pounds carrots peeled and sliced into 1/2 inch rounds
6 sliced jalapenos
3 Anaheim chilis deveined and chopped into 1 inch pieces
3 Passia peppers deveined and chopped into 1 inch pieces
2 chopped onions
2 C chopped celery

Into each sterilized jar, place 1/4 tsp each of cumin seed, coriander, black peppercorns, and mustard seed.  Add 1 small bay leaf, 1 dried chile de arbol, and 1/2 T minced garlic.  Fill jars with vegetables, packing as tightly as possible.  Add 1/8 tsp pickle crisp to each jar.  Top with boiling brine liquid:
3 C white vinegar
3 C water
1 T canning salt
Release air from jars by using a chopstick inserted in several places in the jar.  Readjust the liquid to achieve 1/2 inch headspace.  Wipe the rims with a clean wet cloth, and screw on lids and rims.  Process 5 minutes in a boiling water bath canner, starting the time when the water reaches a good boil after the jars are imersed in water.  Place processed jars on a thick towel not touching each other to cool.


Wednesday, May 9, 2012

Pressure Cooking Chicken Cacciatore

My husband and I went garage sale shopping last Saturday.  I had to go get blood drawn, and we were up and out earlier than I needed to be there.  I have been trying to find a tricycle for my little kids, so we went down and copied addresses and hit six or seven sales.
We made out pretty good.  I found a folding toddler seat with a tray just exactly like the one I already have, some Disney movies for the kids to enjoy, a great Taste of Home Cookbook, and a pressure canner.
I have the exact same model of pressure canner, except mine is a 22 quart, and this one is an 8 quart. That means I can use the new one to pressure can smaller batches of food in less time, because it doesn't have to build up pressure to fill the 22 quart space.  I was SO excited to find it for three dollars.  It is in like new condition, and the rubber seal was still good, to my surprise.
I haven't used it for canning yet, but I tried it out to make supper tonight.
Pressure cooking is an excellent method for tenderizing and getting slow cooking food done quickly.  It is a wonderful way to cook dried beans, rice, stews, and fricassee type meals.
I had a little bit of trepidation about pressure cooking.  When I was growing up, my Mom used her pressure cooker often.  My father was a hunter, and fisherman, so we had lots of wild game to eat.  Instead of chicken, we ate sage grouse.  We had elk steak and roast instead of beef.  My mother was not so creative in her cooking style, so often she would pressure cook meat like elk roast for meals.  I don't think she browned the food before pressure cooking it, or used a lot of seasoning, and it always was bland, grey and tasteless.  However, that chchchchch sound was a part of my daily experience as a kid, and I decided I'd try out my "new" cooker for supper tonight, mostly just for old time's sake.
I had some chicken leg quarters thawed out for dinner, and some pasilla peppers that needed used up.  I decided to make Cacciatore, or Hunter's Stew. This is a meal that was put on the back burner before the hunters headed out to the field.  It is served over a starch like pasta or rice, and is a delicious recipe, especially with the dark meat leg pieces.  It is a slow cooker favorite of mine, but you can make it in the pressure cooker in less than an hour, prep included.

Pressure Cooker Chicken Cacciatore

3 T olive oil
4 Chicken leg quarters
1 diced onion
4 stalks celery diced
3 passia chili peppers diced, seeds and ribs removed
2 pkg sliced button mushrooms
3 minced garlic cloves
1 tsp oregano
1 tsp basil
1/4 tsp red pepper flake
1/2 bottle red wine (I used a petite syrah)
1 small can tomato paste
2 pints/small cans tomatoes
salt and pepper to taste

Season leg quarters and brown in the pressure cooker with the lid removed.  After the chicken is browned well on both sides, remove the chicken to a plate, and add the vegetables.  Saute until the onions are starting to soften.  Add the garlic and spices, and deglaze the pan with the wine, scraping up the browned bits with a spatula. Add the tomatoes, and season to taste.  Nestle the chicken back in the pan and put on the lid.  Cook on high heat with the weighted gauge on 10 pounds.  When the gauge starts to chitter, reduce the heat slightly and cook for 25 minutes.  This will take a little practice to know where to turn it to so that it still chitters, but doesn't get so hot it blows off too much steam.  I have pressure canned for years, so I know exactly where to set it to maintain that happy medium.  Turn off the heat, and let the cooker stand for 5 minutes on the burner.  Carefully move the closed cooker with the weighted gauge still on to the sink, and then run cold water over it.  Remove the weighted gauge.  When no more steam escapes the valve, it is safe to open the cooker.
You will be amazed how deep red the sauce is, as the tomato's natural sugars have caramelized.  It is called the Maillard Reaction, in technical terms, and it spells big flavor.  The chicken comes out moist and fall off the bone tender in this short amount of time.  The wine, tomato, herb and garlic flavors have permeated the meat because of the pressure applied.
Honestly, It took less than an hour, even with chopping vegetables and browning the chicken included. I will never cook Cacciatore in my slow cooker again!


Sunday, April 29, 2012

Canning in the Eye of the Storm

This is Don going through the neighbor's pasture to get my holstien, Mooser.  He escaped and he wasn't the only one this morning.
We got a wake up call from the neighbor that our client's horse was in the lane.  He had bowed the gate in half, so after we got him contained, we had to drive over the gate to straighten it out.
He bred my filly, by the way, so now I will be going to the vet first thing tomorrow for a shot to keep her from having a foal.
That is, right after I go to get my dog out of the pound. Don and Joel stopped at the Mini Mart to get gasoline, and apparently she jumped out.  They fixed fence all morning assuming she was sleeping in the stall barn where she always is, and then realized she must have bailed at the gas station.  By the time they came back, she was already in the pound.
She had a bath the night before, so she didn't have a collar on.  We will be looking at not only dog at large, but no tags or city licence fines too.  Oh joy.
All week long I have been canning like a fiend.  I did 40 pints of tomatoes with onion, garlic and basil.  The recipe is in the new Ball book.
Diced tomatoes with onion, garlic and fresh basil
I also am working through twenty five pounds of carrots.  I made glazed carrots with part of them.  It is a pressure canned recipe but it is very simple.

Glazed Orage Carrots
Peeled carrots cut to size for pint jars
to each pint add:
1 t frozen orange concentrate
2 T brown sugar
1 scant slice of butter
fill jars up with boiling water leaving 1" headspace
wipe the top of the jars, and adjust rings and lids.  Process 25 minutes at 15 pounds pressure (at 5000 ft elevation).  
I got sixteen pints out of the carrots so far, and still have half of them left to can.  I will do them plain with the addition of marjoram and pressure can them.  I have a huge pressure canner, and I  can do sixteen pints at one time, so it shouldn't take too much longer.
Orange Glazed Carrots
I had about four pints of diced tomatoes left from the other canning, so when I cleaned out the fridge yesterday, I added some sliced jalapenos and other ingredients to make a canner load of salsa.  We love salsa, so it is always a welcome addition to my pantry.  I didn't use a recipe, just mixed equal parts of tomatoes with equal parts of onion and sliced jalapenos (fresh ones).  I added chopped celery, lime juice, cider vinegar, a whole bunch of fresh cilantro including the stems chopped finely, smoked paprika, cumin, and 1 t canning salt.  I added 2 small cans of tomato paste, and brought it to a boil.  Ladled into hot jars, leaving 1/2 inch headspace and processed 15 minutes in a boiling water bath.  I was secretly hoping that one jar wouldn't seal, so we would have to eat it.  

Tomato Jalapeno Salsa

So, it's back to the kitchen again to finish up the carrots, and then I'll be working on the fresh Strawberries I got yesterday.  I already have them hulled and ready to go, just need to make some jam.  MMmmmm...it smells good when you boil jam.  
I hope it will lift some spirits when they come back from fixing fence.


Wednesday, March 14, 2012

Mango Chutney


I got my first Bountiful Basket this last weekend.  It is a great program to get fresh fruits and vegetables, and organic food locally.  I bought a flat of mangoes, and have been canning Mango Chutney.   I have ten jars, and enough mangoes left in the bowl for one more batch.
Chutney is a spicy sweet condiment for meats, fish, etc...It tastes vaguely of curry, and is very good with lamb, which is fortunate, since we are having lamb kabobs tonight.
As you can see in the picture above, the mangoes I got in my basket are not the typical red/green ones you see in the store, and are a little more tart than those bigger mangoes we are used to eating, but they made an awesome chutney.  I adapted this recipe from an old one I had from a Bon Appetite mag from the eighties.  It called for mango juice, which I could not find, but I used mango nectar, which they carry at Mr. D's grocery here locally.   The hardest thing to find was the hot pickled cherry peppers.  Everybody had cherry peppers, but only D's had the hot ones.

Mango Chutney

3 lbs. ripe mangoes, peeled and diced
1 C mango nectar
1/2 C lemon juice
4 garlic cloves minced
1 1 inch piece peeled fresh ginger
1 C sugar
1 tsp ground coriander
1/2 tsp ground ginger
1/4 tsp dry mustard
1/4 tsp cayenne pepper
2 hot pickled cherry peppers minced
1/2 C cashews

In a non reactive pan, bring all ingredients to a boil.  Cook stirring frequently until the liquid becomes thickened enough to coat the back of a spoon.  Remove from heat and discard ginger.  Ladle into hot sterilized jars, and process 15 minutes in boiling water bath.  Cool and check for seal.  If a jar doesn't seal, refrigerate and use within two weeks.

Sunday, March 4, 2012

Cottage Bacon and Red Eye Gravy with Parmesan Pepper Biscuits


We had a breakfast eye opener this morning.  Red eye gravy is a yummy way to get some caffeine into your day.  It's made with the drippings from cooking ham, or in this case cottage bacon.  To that, you add strong hot coffee and a little brown sugar.  If you like coffee with cream and sweetener, you'll love red eye gravy.
The biscuits are out of the can, just sprinkled with some Parmesan cheese and cracked black pepper before baking them off.  They tasted awesome with a little gravy over the top!
If you can't get cottage bacon where you live, you could certainly substitute a ham steak.  We have Clark's Meathouse in Riverton Wyoming, and they smoke an awesome cottage bacon, so we always have some on hand.

Red Eye Gravy

3 pieces of cottage bacon
2 T butter
2 tsp flour
2 T packed brown sugar
1-2 C hot strong coffee (it depends how thick you want the gravy)
1 C milk

Brown cottage bacon in the pan with 1 T butter.  Remove bacon and add remaining T butter, and flour to the ham drippings.  Stir with a whisk until butter and flour is browned and nutty smelling.  Add coffee, stirring to prevent lumps.  Add in milk and bring to a boil.  Sprinkle in brown sugar, and simmer 5 minutes.

Thursday, March 1, 2012

Chicken and Sausage Gumbo

We are in the thick of lambing.  Nobody is doing much since yesterday morning, but you still have to check.  We don't live where our farm lease is, so it requires us to travel fifteen miles to check.  I'm burning up all the savings I got at the pump from buying groceries!  It's OK, I love lambing.  There is not a more beautiful thing than watching a new life come into the world.
I was fairly well prepared this year, having lots of homemade soups, and prepared dishes made ahead, so we won't be rushing to eat a meal, and have to resort to eating out. We gave up eating out for Lent, so that gives me extra incentive to have meals I can heat to eat ready.
We have noticed that when we do eat out, and eat junk food, we have no energy and feel yucky anyway.  All that fast food is not good at giving energy and providing what our bodies need to thrive.
I had some time here at the house day before yesterday, and so I fixed a big pot of Chicken and Sausage Gumbo.  It was so cold outside, and the hot thick Gumbo served over steamy white rice really tasted good after spending time in the lambing barn.
We had it again yesterday for lunch, and it got a mixed review from the daycare kids.  Bridger got a woody piece of okra, and so he was not too keen on eating more of it.  It happens occasionally, and I tried to convince him that the rest was tender and tasty.  He got really motivated to finish when he saw the other kids getting raspberry sherbet and homemade cookies for dessert.  Bridger told me that the soup was pretty good except for that straw piece that was in it.
I like to put both okra and file powder in my gumbo.  Okra thickens it if you leave it simmer for a long time, but I like to add the okra close to the end of cooking to keep it more tender.  Traditionally, gumbo was made with okra during it's growing season, and file powder when fresh okra wasn't available.
I can readily get frozen okra, and andouille sausage at my local grocery store, so this is a meal I can put together from my freezer and pantry without having to go to the store for ingredients.

Chicken and Sausage Gumbo
4-5 Andouille sausage sliced
4-5 skinless boneless chicken thighs cut into bite size pieces
2 T olive oil
1 yellow onion diced
1 C diced celery and it's leaves
1 large green pepper diced
2 quarts/large cans diced tomatoes
1 bag frozen okra slices
1 quart/box chicken stock
2 garlic cloves minced
1 tsp dried thyme
1 T Worcestershire sauce
1 tsp Frank's hot sauce
Salt and pepper to taste
file powder

In a large stockpot, sweat onions, celery, green pepper and adouille sausage and chicken in oil.  When onions become opaque, add garlic, tomatoes, chicken stock, hot sauce and Worcestershire.  Bring to a boil, and reduce heat to a simmer.  Simmer two hours covered.  Taste and adjust seasoning.  Add in frozen okra and bring to a boil.  Add 1-2 tsp file powder and boil until thickened.  Serve over hot white rice.
Gumbo is always better the second day, and it freezes beautifully.


Tuesday, February 14, 2012

Rice and Beans: The base for Chile Relleno Bake and Meatless Enchiladas!

Spanish Rice and Beans leftover from making Meatless Enchiladas

I made a big batch of rice and beans on Sunday.  Then 2/3 of the batch went into my rice and bean enchiladas, which are hanging out in the freezer, waiting for next "meatless Monday".  Besides trying to integrate fish more into our diets, we also have added one meatless day. We don't always eat it on Monday, but it's a catchy name!  This is what is left from my enchilada making, and could be frozen.
I love eggs, and this is an egg based dish.  Kind of a cross between scalloped corn and Spanish rice.  It bakes up light almost cakey in consistency.  It gets a gooey top of melted cheese to go with the whole green chiles that are layered inside, and hence the name Chile Relleno Bake.
On it's own, this Spanish rice and beans is a great side dish for other Mexican food.  It's just a basic kind of Spanish rice recipe with black beans added.

Spanish Rice and Beans
1 14 1/2 oz can/pint of diced tomatoes
1 1/2 C water
1 1/4 C uncooked rice
1 T butter
1 T chili powder
1 tsp smoked paprika
1/2 tsp garlic powder
2 jalapenos, seeds and ribs removed and diced
2 14 1/2 oz cans black beans rinsed and drained

Combine all ingredients except beans in a saucepan.  Bring to a boil, and stir to combine.  Lower heat to medium, and cover with a lid.  Cook 20 minutes or until rice is done.  Remove from heat and stir in black beans.  This would be great piled into green peppers and topped with pepper jack cheese.

Bean and Rice Enchiladas
When this mixture cools, I spoon it into whole wheat tortillas, along with a couple strips of queso fresco cheese and place seam side down in a jelly roll pan (11x15) that I have oiled with canola oil.  I top it with salsa, or green enchilada sauce.  This makes a dozen large enchiladas.  At this point, I cover it with foil and put it in the freezer.  On the night I bake it, I will cook it at 375*F for an hour, and then remove foil and add shredded cheese and cook until the cheese melts and it's bubbly hot.

Chile Relleno Bake
Approx 2 C Spanish rice and beans
8 eggs
1/2 C buttermilk
1 14 1/2 oz can of corn drained
Salt and pepper to taste
2 7 oz cans whole green chiles drained
In a greased casserole dish, whisk together the eggs and milk.  Add in the rice and beans and the corn.  Mix well.  Carefully layer  the whole chiles in the mixture.  Bake at 375*F for on hour, or until it pulls away from the side, and is golden brown like this:


Chile Relleno Bake before the addition of cheese

 Top with shredded cheese, and put back in the oven long enough to melt the cheese.  Makes six servings.  I served it with Dutch Style Slaw, and hot sauce.  This is a great dish to serve at brunch!


Chile Relleno Bake, the finished product served with Dutch Style Slaw (see tomorrow's blog)


Sunday, February 12, 2012

Turbo Cook Sunday: Sicilian Style Mahi Mahi over Couscous

The quality of frozen fish these days is very good.  Being land locked, we don't have many options for fresh fish.  Trout is about the extent of it.  I really like fish, and try to encorporate it into at least one meal a week.  The best thing about fish is that it cooks very quickly, is versatile in the ways you can use it, and if all else fails, you can hack it up when it's still frozen if you forget to get it out to thaw.  (Gee, I wonder who does that? *wink*).
Today is my turbo cook day.  We are getting close to lambing, and I have three babies to take care of every day.  I have to plan ahead to keep from getting behind.  My little kids start coming before seven, and don't go home until 5:30 or 6:00 at night.  I can't spend a large amount of time in the kitchen while they are here, so I turbo cook on the weekends, and then I am free to play, and properly care for them, and still put a nutritious hot meal on the table. 
I have already filled the crockpot with Swedish Stewed Lamb, and made a big batch of rice and black bean enchiladas(I will post recipes later this week), and have leftover rice and beans for a chile relleno casserole on roping night.  Now I can turn my attention to lunch today.  I like to double cook for my daycare.  I make a recipe for eight instead of four, and then I have hot meals for my babies' lunch.  They will love the tangy Sicilian Style Mahi Mahi, and it will only require me to heat up the saucy fish, and boil water to make the Couscous.
This fish would be equally good with pasta, or even served over boiled potatoes mashed with a little butter.  I'm sure if I were true Italian, I would make polenta or something fancy. It has a tomato based sauce with sliced garlic, green olives and capers, sprinkled with fresh parsley.  This recipe makes eight servings, but only uses two portions of frozen fish. It is economical, as well as convenient, because it uses pantry staples like tomatoes, olives and frozen fish.  It is also a one pot meal.  Well, one pot and a bowl to make the couscous in.  Best of all, it takes less than thirty minutes to prepare!

Sicilian Style Mahi Mahi with Couscous

Sicilian Style Mahi Mahi with Couscous
3 T olive oil
twelve cloves of garlic thinly sliced
Three 14.5 oz cans of diced tomatoes
1 C chopped green olives drained
1/2 8 oz jar capers rinsed and drained
1/3 C chopped fresh parsley
1/2 tsp black pepper
 Two thawed portions of Mahi Mahi, cut into cubes (you can get away with hacking it up frozen if you forget to thaw)
zest of one lemon divided*
juice of 1/2 lemon
In a large skillet or dutch oven with the heat off, add the oil and thinly sliced garlic and bring the heat up to medium high.  When the garlic starts to get a tiny bit golden, add the tomatoes, capers, olives, parsley and pepper.  On high, bring it to a boil, and reduce the heat to simmer for ten minutes.  Add in fish and cook until fish turns opaque and flakes easily, about ten minutes more.  Just before serving, add the zest and juice of lemon.  If you add it in sooner, it can become bitter.  Serve with extra lemon wedges, and over couscous.
Lemon Couscous:
Put tea kettle on to boil.  In a medium size mixing bowl, put 1 C uncooked couscous, 1/2 zest of one lemon, 1/2 tsp Mrs. Dash, 1 T butter, and salt and pepper to taste. When the water boils, add 1C boiling water to the couscous, and cover the bowl with a plate or lid.  After a few minutes, take off the plate and fluff couscous with a fork.  Dish into a pasta bowl and top with Mahi Mahi sauce. Makes four servings.

Friday, February 3, 2012

Buttermilk Pumpkin Mac N Cheese

This is hands down the daycare favorite meal.  Creamy Pumpkin Mac and Cheese made with lowfat buttermilk.  It's tangy and filling, and full of vitamin A. According to Libby's webpage:  http://www.myfitnesspal.com/food/calories/libbys-pure-pumpkin-15-oz-can-22647796
a 4 oz serving of pumpkin only has forty calories, and provides 300 % of the vitamin A needed in a day. 
 I have a three year old, two year old and a one year old baby, and they all cleaned their plates! 

Buttermilk Pumpkin Mac N Cheese
1 box short cut pasta, like macaroni (I only had penne, but it works great too) cooked and drained
3 T butter
3 T flour
salt and pepper
3 C buttermilk
1 tsp grill seasoning
pinch of ground nutmeg
4 C grated sharp cheddar cheese
1 15 oz can libby pumpkin (make sure it's not pie filling)

In the pot you boiled the pasta in, melt the butter and add the flour.  It should foam and start to smell nutty.  You are building a bechamel sauce.  Add the buttermilk in small increments, whisking to encorporate and avoid lumps.  Let the sauce come to a bubble under medium high heat while you whisk, and then add more buttermilk, let it return to a bubble, etc... until all of it is used.  It should resemble a medium bodied gravy.  It will thicken when you add the cheese and pumpkin.  Season and then add the shredded cheese.  Stir well until cheese is melted.  Finally, add the pumpkin and stir well to encorporate. 


Saturday, January 28, 2012

Oregon Butte- A Chicken, Sundried Tomato and Artichoke Pizza with Basil Whole Wheat Crust

Homemade Pizza is a slice of my childhood on a plate.  My mother used to make a Bisquick pizza for us.  This is that pizza's upscale cousin.  The dough is half and half white and whole wheat flour, and the pizza is our home version of a local resteraunt favorite called the Oregano Trail. This pizza features grilled chicken strips.  These are great for pizza, as you can use them frozen, and they come out perfect as the pizza bakes.

Basil Whole Wheat Crust
1 1/2 C lukewarm water
1 T olive oil
1 tsp melted butter
1 tsp salt
2 tsp dried basil
2 C  whole wheat flour
2 C white flour

In a mixer with a dough hook, mix together all ingredients.  Knead for five minutes.  You may need to adjust dough by adding a little more water, or flour to get the desired consistency.  It should be a sticky dough that cleans the bowl.  In a bowl with 1 T olive oil, turn dough out and turn over to coat all the sides in oil.  Let rise 30 minutes.  Punch down dough, and cut in half.  Makes two large rectangular pizzas on baking sheets with sides.  You can bag half and refridgerate for 24 hours. 
Press the dough in the bottom and up the sides of the baking sheet, using a rolling pin if necessary. Ladle on homemade sauce:

Homemade Pizza Sauce
1 pint/can tomato sauce
1 small can tomato paste
2 cloves minced garlic
1/2 tsp red pepper flake
1 tsp marjoram
1 tsp basil
salt and pepper to taste
In a saucepan, combine the above ingredients and simmer.  Ladle over two pizza crusts, and add toppings:

Oregon Butte Toppings for Pizza
2 C frozen grilled chicken strips
1 can drained artichoke hearts quartered
1/2 onion halved and thinly sliced
1 C smoked sun dried tomato strips 
2 pieces cooked bacon crumbled
2 C Shredded Mozarella Cheese
1 tsp oregano
Mrs. Dash original, or salt and pepper to taste

Place pizzas in the upper part of the oven on 400*F for close to 1 hour.  Loosen with a spatula, and slide out onto a cutting board to slice. 


Monday, January 23, 2012

Pulled Pork Enchiladas

I put a whole pork roast in the crock pot last weekend.  We had sandwiches, BBQ pork, and with the last of it, I made this dish to put in the freezer for a later date. 
When I cook a roast in the crock pot, I don't put anything else in but the roast, and some seasonings.  No liquid at all.  It will make it's own liquid as it cooks, and get browned that way.  I like to season my pork with lots of smoked paprika, Clark's seasoning (local butcher shop season salt blend), and some garlic powder. 
After the pork gets fork tender, I can pull it apart, and portion it into Tupperware according to what I will use it for.  I pour on the rendered liquid to keep the meat moist.   It can be frozen at this point, if I don't have time to use it in a recipe. 
These are super easy enchiladas.  Very few ingredients, and mild flavored.  I use my Quien Sabe sauce for these, which is also good thickened and used in place of gravy a tex mex style pot roast. 

Pulled Pork Enchiladas
4 C pulled pork
8 oz. light cream cheese
10-12 flour tortillas
Mix pork with softened cream cheese.  Place a couple of spoon fulls on each tortilla.  Roll up and place in a jelly roll size pan in which you have half of the Quien Sabe sauce.  Top with remaining sauce.  Cover with foil.  I froze them at this point.  To bake them off, thaw them first, and bake at 375*F  until bubbly, about thirty minutes.  Remove foil and top with shredded cheese, and bake another few minutes to melt the cheese. 

Quien Sabe Sauce
1 pint/can diced tomatoes
1 qt/ large can tomatillos
1 small can whole green chiles
1/2 tsp adobo seasoning
1 large onion diced
3 cloves garlic minced

In a skillet, saute onion  and garlic in butter.  Add to remaining ingredients and blend in a blender until smooth.  Pour half in the bottom of the enchilada pan, and then pour remaining sauce on top.

Friday, January 20, 2012

Wagon Wheel Tuna Casserole

As I have said before, noodles are a toddler favorite.  This casserole we had today has shifted the wagon wheel pasta into the new favorite roll.  Move over rigatoni, there's a new sherriff in town!
It's been a long lousy week for me.  I haven't felt well, and it was an almost herculean effort to fix the last lunch meal before the weekend.  Besides not feeling great, my husband has been out of town due to road closures, so I am in charge of all the farm chores.  I am really glad that my work week is almost over.
This is an easy "eat it now, and have it for later" meal.  It makes a ton of pasta, and freezes well.  Even though I feel like something a coyote et and crapped over a cliff, I pulled it off. 

I don't use a lot of canned cream soups, or any canned soups for that matter.  I can make a superior product in about the same amount of time it takes to heat up canned soup, and can control salt and sugar etc...I do however, always have chicken and beef stock on hand.  Either homemade, or in the box. I can make a creamed soup zip quick with stock, some cornstarch or butter and flour, buttermilk and a few herbs.  I use buttermilk because it is lowfat, and has a little tang to it.  I also hate to waste food, so I'm always looking for ways to use up buttermilk before it goes bad.

Wagon Wheel Tuna Casserole
1 box wagon wheel shaped pasta cooked and drained
2 C chicken stock
1 C buttermilk
2 heaping T cornstarch
1/2 tsp basil
1 T minced garlic
2 cans/pints diced tomatoes
2 tins tuna and their juice
1 can Italian flat green beans and their juice
2 C Velveeta cubed
1 tsp Old Bay seasoning

In the pan you just cooked the pasta in, mix the chicken stock, buttermilk, basil, garlic and cornstarch, and whisk to combine.  Add in the tuna and liquid, tomatoes, Old Bay and green beans.  Bring to a boil.  Reduce to a simmer stirring often, and add cheese cubes.  When cheese is melted, add the cooked pasta and toss to coat.
This fed three hungry toddlers a 1 C serving each, plus Joel and I a 1 1/2 C serving.  There is enough to fill a 2 quart casserole, and it will go in the freezer for later on.  To reheat, place in a 325 F oven until bubbly, about 1 hour. 

Thursday, January 19, 2012

Greek Pasta Salad with Lemon Yogurt Dressing

Pasta salad often lives in our fridge.  It comes in handy for Don's lunches, to take to the barn when we are training, or for feeding toddlers.  Babies love anything with noodles. 
My little ones love this pasta.  It's tangy and creamy, and it has rotini, the toddler's pick for noodles.

Greek Pasta Salad with Lemon Yogurt Dressing

1 box rotini, cooked, drained and cooled
1 carton of cherry or grape tomatoes, halved
1/2 C sliced drained black olives
1 C Feta Cheese
1 onion chopped
1/2 peeled and chopped cucumber

Dressing:
juice and zest of 2 lemons
1/3 C Greek plain yogurt
1/2 tsp marjoram
2 T fresh chopped parsley
1/8 tsp white pepper
1/4 C olive oil

In a large bowl, combine salad ingredients.  In a canning jar, add all dressing ingredients, put on the lid and shake to combine.  Because of the salty feta and olives, I dress the salad first, and then adjust the salt level.  Most of the time I don't add any salt.  Cover salad and refridgerate for a couple hours before serving.  Lasts in the fridge all week for lunches!

Thursday, January 12, 2012

Turbo Cooking: Hamburger Stack Casserole, Split Pea Soup with Potatoes

My little girls were very tired this morning, and so I had a reprieve while they took a morning nap.  It allowed me to get soup on in the crockpot for supper, and and got a  roaster full of casserole in the oven to slow cook for lunch. 
Turbo cooking is putting together several dishes at the same time.  It is multitasking at it's finest in the kitchen.  I got all the dishes done, made oatmeal for tomorrows breakfast, and got lunch and dinner ready. 
I personally don't eat oatmeal, but my little kids, and my son Joel really like it.  I can go ahead and cook the old fashioned, or Scottish oats and put them in a container to cool and store for tomorrow.  When I go to make breakfast tomorrow, I'll peel and chop an apple, and add some dried fruit:  cherries, prunes, apricots or raisins.  I'll saute them in a little butter, and add milk or water just to cover to stew them.  I'll add a spoon of sugar and some cinnamon to the stewed fruit, and bring it to a boil, and then lower the heat to simmer.  When it looks like the fruit is tender, I'll add in the cooked oatmeal.  It gets topped with a pat of butter, and another sprinkle of sugar, or a drizzle of maple syrup.  This is very filling and much tastier than those little packets of mush.
While I am waiting for the water to boil to make oatmeal, I can put together lunch and dinner.  The ingredients are similar, so I save time doing it all at once. 
I am also washing dishes as I go along, so that they are all done when I finish making meals! 
Split Pea with Potato Soup

1 pkg dried split green peas that have been washed and picked through for stones
1 onion chopped
3 carrots peeled and sliced
3 stalks of celery
4 potatoes peeled and diced
3 garlic cloves diced
1 quart water
1 T ham soup base
1 T chicken and tomato soup base
1/2 tsp thyme
1 quart/box beef stock

Place all ingredients in slow cooker.  Cook on high for 6-8 hours.  Right before serving, blend a couple cups of the soup in a blender or food processor.  Add this back to the soup to thicken it.  Adjust salt and pepper to taste at this time.  Soup base, especially ham is very salty, so you don't want to add salt at the beginning of cooking. 

Hamburger Stack Casserole

1 onion sliced in 1/4 inch slices
4 potatoes, peeled and sliced in 1/4 inch slices
2 carrots peeled and sliced
6 frozen hamburger patties
1 quart/box of chicken stock
2 C water
3 T cornstarch
Salt and pepper to taste
2 fresh bay leaves
sprig of fresh rosemary

Grease casserole pan with butter, and add each vegetable in layers.  Tuck the herbs down in the pan, and top with chicken stock and water with cornstarch.  Salt and pepper.  Cover with a lid, and bake at 325*F for two and a half hours, or until potatoes test done.  Serve hamburgers open faced on a piece of garlic toast, with vegetables on the side, and gravy over the top.

Wednesday, January 11, 2012

Pot Roast- so easy it ought to be illegal

My husband's all time favorite meal is beef roast with potatoes and carrots.  That tender beef that has been studded with garlic cloves and is so moist and tender you can cut it with your fork. 
I found a new way to cook a chuck roast that is so easy, it should be illegal.  It comes out of the oven with the gravy already made, and you can not believe how almost fall apart tender it is. 
I really like roast, because I can brown it and stick it in the oven, and then not be stuck in the kitchen watching over things until it's done.  I feel really good when Don comes in the door, and tells me he could smell the yummy roast before he came into the house.  It pleases me to please him!
I have several of my Dad's old cast iron pots.  I love them because they are hand hammered, and have been sized so many times, they are easy to cook  in and clean.  I have one big skillet, that must have been used for chicken frying, or such.  Not quite as deep as a dutch oven, but wider.  That is what I use for pot roast. 
It is a beautiful thing to go to the oven and pull out a roast bubbling in rich gravy and nestled with tender meat flavor infused potatoes. 


Pot Roast and Potatoes

2 T olive oil
1 3 lb (about) chuck roast
4 potatoes peeled quartered longways
1 onion peeled and cut in wedges
2 C beef stock
3 heaping T cornstarch
10 cloves peeled garlic
2 fresh bay leaves
1 stalk fresh rosemary

Salt and pepper roast on both sides.  Make slits in the meat and insert the garlic cloves on both sides.  In a large dutch oven or chicken fryer (oven safe),  brown both sides of the roast in oil.  Remove to a plate.   In the measuring cup, whisk together the beef stock and cornstarch until it is a slurry.  Add to the pan and with a spatula, scrape up the browned bits.  Turn off the burner, and add the roast and vegetables back in.  Tuck a couple bay leaves down into the broth, and top the roast with a whole sprig of rosemary.  Cover and bake at 310*F for two and a half to three hours.

Monday, January 9, 2012

Canadian Cheese Soup and Ham Rolls

This was one of those weekends that you hate to have end.  We had a great time this weekend. 
Saturday, we went to get case goods and hay in town.  It was one of those beautiful blue sky days, and we enjoyed the fact that Riverton has no snow pack like we do.  It is still very snowy at our farm lease, and since we had some Chinook winds,  the snow melted and is pretty much just a skating pond in the lane and in the corrals.  It is so slick that when I went to back the trailer up after unloading the hay, I backed into the fence and popped off the staples in one section.  It's not that I didn't stop, I just kept sliding backwards even though the brakes were on. 
In our local market, they have a case lot sale every January.  We stock up on vegetables and all kinds of canned beans.  I have to admit, I love case lot sales.  When we get home, I can arrange it all, and have full shelves for the next year.  It's a great feeling to know we are provided for. I always loved playing store when I was little, I guess it is like that for me now, too!
Sunday, we went to Pavillion to the Philleos house.  Don had a colt that he needed to put a first ride on, and there were several other people there to get help with their cutting.  It was sunny but cold, and we had a wonderful time.  Our horses got exposed to a little cutting practice, and Don got a great first ride on his little colt, with the help of JD Philleo.
My friend Sammi served up some yummy beef stew for lunch with homemade fry bread, and I brought a roaster full of ham rolls.
It was dinner time when we got home, and so I made a quick pot of cheese soup.  It is a fifteen minute meal, and I have two quarts left over for lunches this week.

Ham Rolls

Ham rolls are not really what I'd call a recipe.  You get one of those half a boneless ham packages in the grocery, and put it through the meat grinder on the larger grind setting.  Then you grind about two and a half pounds of cheese, a whole peeled onion,  and 1 cup of pickles (I used bread and butters).  To this mixture,  you add 1/2 C grainy mustard, and 2 C mayonnaise.  This is great filling, and also great served at parties on crackers, or as lunch meat in sandwiches. 
I grew up on this recipe, only we used roast beef, ground bologna or wild game in place of the ham.  We called it "lunch meat", and it was what our sandwiches were made of. 
To make ham rolls, I purchase hard rolls from my local bakery, and with my index fingers, open up a pocket in the end of the roll so I can spoon in the ham lunch meat filling.  It's like making a jelly doughnut.  Then they get wrapped in foil, and put in the roaster or oven at 350*F for half an hour, or just until the filling gets hot enough to melt the cheese and crisp the bread.  This makes enough filling for about three dozen hamburger bun size hard rolls, so it is great at family gatherings, or for branding crews.  You can make the rolls hours ahead of time, and just turn on the roaster at the last minute.  I make them when Don teaches a clinic for the participants.

Canadian Cheese Soup

1pkg Canadian bacon diced (about 4-5 pieces)
1 bag frozen potatoes O'Brien
1 onion sliced
4 jalapeno peppers seeded and diced
2 tsp chicken and tomato bullion
1 large package Velveeta cheese cut into chunks
salt and pepper to taste

In a large pot, saute onions, bacon and jalapenos in oil.  Add frozen potatoes and enough water to cover, about 4 cups.  Add bullion and bring to a boil.  Reduce to a simmer, and add cubed cheese, stirring until the cheese is all melted.  Season with salt and pepper to taste. 

Saturday, January 7, 2012

Stretching a Buck: Pork and Chard Stirfry, Chunky Pork and Vegetable Chili

We had a serious reduction in salary this last month.  That made for a hard Christmas season, but also hard on my household budget. That's the bad part about working for yourself;  if you don't work you don't get paid.  My little daycare kids got Mono, and not at the same time, so they didn't come for most of the month. 
I don't mind being short occasionally, I actually see it as a challenge. So, I put my thinking cap on and figure out ways to stretch whatever I have to buy in the store.  We drink less orange juice, buy less fresh produce, and use less of the protien we buy at the store in each meal.  It is amazing how much you can really shave off the total cost of groceries if you really need to, without compromising nutrition. 
I have a freezer full of lamb (that we raise) and various cuts of meat that I've bought when it's on sale.  When I do buy protien in a budget crunch situation, it has to meet two criteria:  cost less than $2 a pound, and can be used to make two meals per pound. 
Boneless pork ribs are what fit in my budget this time.  Boneless pork ribs are my meat of choice for stir fry.  If they are chilled, you can slice them very thin, which works well for marinating, and produce a juicy, tender meat in these types of quick cooking  dishes. So, half of my one pound package of meat goes towards the stir fry dish, and the other half gets cut into half inch cubes for my chunky pork and vegetable chili.  If your source of protien is limited, then it needs to be either cut thinly, or in small pieces so it doesn't look skimpy on the plate. 
We eat lots of fresh greens, and I will not skimp on that part of our grocery budget.  We have swiss chard often, along with spinach and collards.  Swiss chard is easy to prepare, and such a vitamin powerhouse of a vegetable.  It is delicious prepared with plain boiled potatoes, or quickly stir fried with some mustard seed and vinegar and oil,   It is delicious paired with eggs for a weekend frittata, or added to minestrone soup in place of spinach. 
When you cook with swiss chard, you must treat it as two vegetables:  the fibrous stalks, and the tender quicker cooking leaves. When I stir fry chard, I pull all the leaves from the stems and dice the stem to cook the same amount of time as onions, only adding in the leaves the last bit just long enough to wilt them.  The same is true for boiling them with potatoes.  The stems go in with the cold potatoes and water, and then the leaves just get added right before draining the water off. 
Whenever the meat is limited, I can bump up the amount of vegetable or starch to make it seem filling.  I made a sweeter version of pork chili, and added what's on hand, mainly celery, carrot and onion. These are vegetables that have a constant place in my pantry of goods.  They last well in long storage, and provide good nutrition and value for my dollar.
I have an aresenal of dried beans and peas that can provide good protien and take up the slack for more costly vegetables and meats in my recipes.  I also have cans of beans on hand at all times.  I buy them when there are case lot sales, and they are 50-60 cents a can.
These two recipes have jalapenos in them.  With the seeds removed, they are mild and tasty.  For some reason, the cost of green peppers has skyrocketed in the last few years.  I just buy whatever pepper or chile is cheapest, and in the best condition.  In the middle of Wyoming where everything this time of year is trucked in, you take what you can get.  Sometimes I buy anahiems, or serrano, and jalapeno. If they all are wrinkled up with age, I will use canned chopped green chiles in their place. 


Pork and Chard Stirfry

1/2 pound boneless pork ribs chilled and sliced in thin slices
1/4 C low sodium soy
1 T grated fresh ginger
zest and juice of 2 lemons
1/2 tsp sriracha hot sauce
2 garlic cloves minced
2 bunches red swiss chard stems diced and leaves chopped and divided
1 bunch green onions diced
2 jalapeno peppers, seeded and chopped
3 stalks celery diced
1 onion diced
canola oil

In a medium sized bowl, mix sliced meat with soy, ginger, lemon zest and juice, and sriracha hot sauce.  Set aside. 
In a hot wok,  stir fry onions and swiss chard stems with green onions, celery, jalapenos and garlic in oil.  Remove to the serving platter. Remove meat from marinade with tongs, and stir fry.  While the meat is removed from the marinade, add two heaping T of corn starch to marinade liquid and stir to combine.    When meat is browned and still tender, add vegetables back in, and add swiss chard leaves.  sprinkle with extra soy sauce to start to steam the chard.  As the chard wilts, add in marinade and corn starch mixture.  Cook until juices thicken and are clear.  Pour back into serving dish, and serve over the top of hot cooked rice.  This made a meal for three, plus breakfast for me the next day.  Yes, I eat Chinese take out for breakfast!

Chunky Pork and Vegetable Chili

1/2 pound boneless pork ribs cut into 1/2 inch cubes
1 onion diced
4 stalks celery diced
4 carrots peeled and diced
4 jalapeno peppers seeded and diced
3 cloves garlic minced
2 T olive oil
1 can/pint diced tomatoes
1 pint/ small jar salsa with corn and chipotle
2 cans black beans rinsed and drained
2 C V-8 or tomato juice
3 Tchili powder
1 tsp cumin
2 tsp adobo seasoning
2 T sugar or stevia

In a large stockpot, brown pork in oil.  Remove and reserve.  Brown onion, celery, carrot and jalapenos.  When the onion is translucent, add garlic, and remaining ingredients.  Return browned pork to the pot, and bring to a boil.  Reduce heat and cover the pot to simmer for 45 minutes.  Season with salt and pepper.  If chili is too thick, add water to get it to desired consistency. 
This made a meal for three, plus two and a half quarts for other meals.  Due to it's mild flavor, the day care babies ate it  for lunch one day and loved it.