It's not easy to stay motivated to cook three meals a day every day. It definitely takes work. It is work, although there isn't pay exchanged. What it adds in financial freedom, and personal enrichment to the family is beyond measure.
So, how do you not get burned out with the fact it is never ending? Well, you do get burned out. But in those times, you dig a little deeper and look a little harder to find inspiration for meals.
I know that I can give my family a gift of a good meal three times a day. It can promote their good health, nourish them physically, and enrich their lives with this work. I can do these small things every day, which upon reflection later in life, create a rich and hopefully happy home life. That's what keeps me going, the promise that I can make their lives better each day with what I do.
The comfort of a cozy home, the warmth of a wood fire, the satisfaction of a good meal, and someone to share it with. Who could ask for more?
Monday, November 3, 2014

Sunday, November 2, 2014
Using What's On Hand- Leftovers Soup
I am lone on the range today. Don and my son Ryan are helping friends work cows again all day. So the day stretches before me, and I can do with it as I will!
We had pasta for supper last night, with a bolognese sauce. It made a lot of leftovers, so I needed a way to use up that sauce. I could have just made ziti bake for the freezer, but then I still have to come up with something for dinner today, that will yield lunches for the week.
I am going to make a leftover soup. I just cleaned out my fridge, but there is a lot of food to use still in the fresh food bins. A bag of small multicolored sweet peppers, a head of cabbage, some turnip.
I have big amounts of carrots, celery on hand always. I keep them in long green tupperware containers, stacked. They last and last like that. That along with my stash of potatoes, onions, and garlic in the pantry are the foundation of my meals.
I was wanting some version of hamburger soup. The pasta sauce we made has lots of crushed tomatoes, hamburger and onions. It's seasoned with garlic, basil and marjoram. I can go so many directions with it. I could add the peppers, and v-8 juice, some rice and make stuffed pepper soup. I can add cabbage and rice or barley, a little cayenne pepper, and make stuffed cabbage soup. I could add taco seasoning, corn, kidney beans and v-8 for taco soup.
I think I'll go for a beef vegetable soup.
Leftover meat sauce (there is about two quarts left)
1 quart beef stock
1 T worcestershire sauce
1 huge turnip peeled and diced
1/2 head chopped cabbage
2 C diced sweet peppers
2 carrots peeled and diced
3 potatoes scrubbed and diced
1 pint/can green beans and their liquid
1 pint/can calico corn (corn with peppers and onions)
Bring it all to a boil, and reduce heat to simmer. Cover and cook long and slow on the simmer burner, in a slow cooker, or in a 250*F oven. Several hours. When I cook soup with cabbage, I like to add a pinch of caraway seeds. It's optional if you don't like the flavor. We have some beautiful black rye bread that we will butter and enjoy with the soup.
I don't know when the guys will get done working cows, so this can be hot and waiting for them when they get home.
We had pasta for supper last night, with a bolognese sauce. It made a lot of leftovers, so I needed a way to use up that sauce. I could have just made ziti bake for the freezer, but then I still have to come up with something for dinner today, that will yield lunches for the week.
I am going to make a leftover soup. I just cleaned out my fridge, but there is a lot of food to use still in the fresh food bins. A bag of small multicolored sweet peppers, a head of cabbage, some turnip.
I have big amounts of carrots, celery on hand always. I keep them in long green tupperware containers, stacked. They last and last like that. That along with my stash of potatoes, onions, and garlic in the pantry are the foundation of my meals.
I was wanting some version of hamburger soup. The pasta sauce we made has lots of crushed tomatoes, hamburger and onions. It's seasoned with garlic, basil and marjoram. I can go so many directions with it. I could add the peppers, and v-8 juice, some rice and make stuffed pepper soup. I can add cabbage and rice or barley, a little cayenne pepper, and make stuffed cabbage soup. I could add taco seasoning, corn, kidney beans and v-8 for taco soup.
I think I'll go for a beef vegetable soup.
Leftover meat sauce (there is about two quarts left)
1 quart beef stock
1 T worcestershire sauce
1 huge turnip peeled and diced
1/2 head chopped cabbage
2 C diced sweet peppers
2 carrots peeled and diced
3 potatoes scrubbed and diced
1 pint/can green beans and their liquid
1 pint/can calico corn (corn with peppers and onions)
Bring it all to a boil, and reduce heat to simmer. Cover and cook long and slow on the simmer burner, in a slow cooker, or in a 250*F oven. Several hours. When I cook soup with cabbage, I like to add a pinch of caraway seeds. It's optional if you don't like the flavor. We have some beautiful black rye bread that we will butter and enjoy with the soup.
I don't know when the guys will get done working cows, so this can be hot and waiting for them when they get home.
Thursday, October 30, 2014
The Condiment Graveyard
It was time finally. I could put it off no longer. The cleaning of the refrigerator happened today. The petrified remains of mystery meals have been removed, and the condiments have been combined to create space. I actually cleaned out a dozen jars of things, and half a dozen pyrex containers.
My fridge is always too full. Besides the usual items most everyone has in their fridge, mine also has vet medicine, and insulin. I buy yeast in bulk, and have weird things like wheat germ, and malted milk powder.
I am kind of addicted to condiments, and since I make my own, I have pint and quart jars of them. They tend to take up a LOT of room. Taco sauce, fire roasted salsa, barbecue sauce, chipotle peppers in adobo, jalapenos in escabeche, cowboy candy, pickles, mustards, jars of salad dressing, hot sauce, more hot sauce, and yet more hot sauce, sesame oil, and oyster sauce.
Then there's food in tubes. cilantro in the tube, anchovy in the tube, tomato paste in the tube, lemongrass in the tube.
I found a large jar of balsamic ketchup I made last year. My husband is a ketchup snob. He uses the Heinz squeeze bottle, and won't use my homemade. So, I took the almost empty Heinz bottle, and was planning to fill it with my homemade ketchup. Ketchup is kind of thick, and the bottle neck is small. Pouring out of the canning jar is impossible, so I tried using a funnel, which wouldn't run since the ketchup is thick. Finally, I lost my temper and patience with the whole situation, and poured the whole jar of ketchup into a zip lock bag, cut the corner out, and squeezed it all into the bottle. I kinda felt smart for a couple minutes over that hehe.
Hey, I think I might really be able to put the toothpaste back in the tube after all, if I had a 20 cc syringe, without a needle...
My fridge is always too full. Besides the usual items most everyone has in their fridge, mine also has vet medicine, and insulin. I buy yeast in bulk, and have weird things like wheat germ, and malted milk powder.
I am kind of addicted to condiments, and since I make my own, I have pint and quart jars of them. They tend to take up a LOT of room. Taco sauce, fire roasted salsa, barbecue sauce, chipotle peppers in adobo, jalapenos in escabeche, cowboy candy, pickles, mustards, jars of salad dressing, hot sauce, more hot sauce, and yet more hot sauce, sesame oil, and oyster sauce.
Then there's food in tubes. cilantro in the tube, anchovy in the tube, tomato paste in the tube, lemongrass in the tube.
I found a large jar of balsamic ketchup I made last year. My husband is a ketchup snob. He uses the Heinz squeeze bottle, and won't use my homemade. So, I took the almost empty Heinz bottle, and was planning to fill it with my homemade ketchup. Ketchup is kind of thick, and the bottle neck is small. Pouring out of the canning jar is impossible, so I tried using a funnel, which wouldn't run since the ketchup is thick. Finally, I lost my temper and patience with the whole situation, and poured the whole jar of ketchup into a zip lock bag, cut the corner out, and squeezed it all into the bottle. I kinda felt smart for a couple minutes over that hehe.
Hey, I think I might really be able to put the toothpaste back in the tube after all, if I had a 20 cc syringe, without a needle...
Tuesday, October 21, 2014
Cornbread Stuffing with Apples and Pork Sausage, Braised Cabbage
I have some cornbread leftover, so this morning, I'll cube it, drizzle with melted butter, and toast it in a 350*F oven until it's golden brown. I plan on using it for a casserole all in one for supper.
Sausage Stuffing with Apples
1 pound spicy pork sausage
1 onion
2 C diced celery
2 carrots peeled and shredded
2 large honeycrisp apples, peeled, cored and diced
chicken stock
1 tsp dried sage
1 tsp dried thyme
1 tsp dried parsley
1 tsp Mrs. Dash
Brown the bulk sausage and onion, celery and shredded carrot in a skillet, then remove with a slotted spoon and add to the toasted cornbread. Add the diced apples and enough hot chicken stock to moisten the cornbread without making it be soggy. Add slowly and stir until it seems moist enough. Add dried herbs and Mrs. Dash or salt and pepper. Spoon gently into a greased baking dish, and cover with foil. Bake at 350*F until steamy hot, about twenty minutes, then remove the foil, and let the top get golden brown.
I'll be serving this with braised red cabbage. When you are picking a cabbage to buy, always look for one that's heavy for it's size. Halve, and then quarter it, and remove the core, then shred fine. I add a T of butter to my nonstick pan, and then add the cabbage and a tsp of whole mustard seed. Add a pinch of red pepper flake, and a half tsp of dill weed. Then a forth cup each of cider vinegar and brown sugar go in, and the remainder of the chicken stock quart used to moisten the cornbread. You want about a cup of stock for a head of cabbage. We don't want it to boil, just slowly braise. Let it come to a boil, then turn down to medium low, and cover with the lid. Serve with a spoonful of sour cream on top, or just a pat of butter.
Sausage Stuffing with Apples
1 pound spicy pork sausage
1 onion
2 C diced celery
2 carrots peeled and shredded
2 large honeycrisp apples, peeled, cored and diced
chicken stock
1 tsp dried sage
1 tsp dried thyme
1 tsp dried parsley
1 tsp Mrs. Dash
Brown the bulk sausage and onion, celery and shredded carrot in a skillet, then remove with a slotted spoon and add to the toasted cornbread. Add the diced apples and enough hot chicken stock to moisten the cornbread without making it be soggy. Add slowly and stir until it seems moist enough. Add dried herbs and Mrs. Dash or salt and pepper. Spoon gently into a greased baking dish, and cover with foil. Bake at 350*F until steamy hot, about twenty minutes, then remove the foil, and let the top get golden brown.
I'll be serving this with braised red cabbage. When you are picking a cabbage to buy, always look for one that's heavy for it's size. Halve, and then quarter it, and remove the core, then shred fine. I add a T of butter to my nonstick pan, and then add the cabbage and a tsp of whole mustard seed. Add a pinch of red pepper flake, and a half tsp of dill weed. Then a forth cup each of cider vinegar and brown sugar go in, and the remainder of the chicken stock quart used to moisten the cornbread. You want about a cup of stock for a head of cabbage. We don't want it to boil, just slowly braise. Let it come to a boil, then turn down to medium low, and cover with the lid. Serve with a spoonful of sour cream on top, or just a pat of butter.
Sunday, October 19, 2014
Sunday Sunday Sunday...
Weekend breakfast rocks! Sourdough waffles with hot syrup, black forest uncured bacon, and a fruit salad made from pummelo, oranges and pink lady apples. Strong coffee chilled with chocolate milk in it. I found a low sugar high protein chocolate milk, and oh my! It's wonderful in iced coffee.
Sourdough Waffles
2 C baking mix
2 eggs
1 C sourdough starter
1 1/2 C buttermilk
1 T oil
Mix all ingredients and let sit fifteen minutes. I mix it then plug in the waffle iron. When it's finally hot and ready to start using it, the batter will be actively bubbling from the sourdough, and light and lovely. You may need to thin the batter a little if it seems heavy. I just use regular milk to do that. When we are done, we'll freeze the leftover waffles for use later this week.
I cooked my bacon on a foil lined sheet pan this morning. When it was crispy and done, I filled the sheet pan with slices of trimmed cauliflower and crimini mushrooms I seasoned with Mrs. Dash and drizzled with olive oil. It will get used to make a creamy oven roasted cauliflower and mushroom soup for lunches this week.
Roasted Cauliflower and Mushroom Soup
1 onion diced
2 T olive oil
In a large skillet, saute' the onion in oil. Add:
1 C bell pepper strips
1 C diced celery
2 diced peeled carrots
1 minced clove garlic
pinch of red pepper flake
tsp dried parsley
1 quart turkey or chicken stock
Add the roasted vegetables (see above) to the soup, and bring to a boil. Reduce heat and simmer twenty minutes. In a large measuring cup, mix 2 C milk with 4 T cornstarch to make a slurry. Add to simmering soup, and stir until thickened. Finish with a pat of butter, and adjust seasoning. Once this is cooled, I'll fill quart jars and store in the fridge.
We went to the grocery store early today, so I took the opportunity to prep that cauliflower and mushroom soup before putting all the produce away. I also prepped the half boneless ham for sandwiches by slicing it thin, and used the end to dice for the freezer. I'll use it for split pea soup, or to cook with black eyed peas one day.
I purchased a half turkey breast. All the skin and bones go into my stockpot filled with water, along with some black peppercorns and a couple fresh bay leaves. I'll have about seven or eight quarts of turkey stock to can when it's done. I'll divide the breast, and slice thinly half of it for sandwiches. The rest gets diced for turkey pot pie, or turkey tettrazini.
Sourdough Waffles
2 C baking mix
2 eggs
1 C sourdough starter
1 1/2 C buttermilk
1 T oil
Mix all ingredients and let sit fifteen minutes. I mix it then plug in the waffle iron. When it's finally hot and ready to start using it, the batter will be actively bubbling from the sourdough, and light and lovely. You may need to thin the batter a little if it seems heavy. I just use regular milk to do that. When we are done, we'll freeze the leftover waffles for use later this week.
I cooked my bacon on a foil lined sheet pan this morning. When it was crispy and done, I filled the sheet pan with slices of trimmed cauliflower and crimini mushrooms I seasoned with Mrs. Dash and drizzled with olive oil. It will get used to make a creamy oven roasted cauliflower and mushroom soup for lunches this week.
Roasted Cauliflower and Mushroom Soup
1 onion diced
2 T olive oil
In a large skillet, saute' the onion in oil. Add:
1 C bell pepper strips
1 C diced celery
2 diced peeled carrots
1 minced clove garlic
pinch of red pepper flake
tsp dried parsley
1 quart turkey or chicken stock
Add the roasted vegetables (see above) to the soup, and bring to a boil. Reduce heat and simmer twenty minutes. In a large measuring cup, mix 2 C milk with 4 T cornstarch to make a slurry. Add to simmering soup, and stir until thickened. Finish with a pat of butter, and adjust seasoning. Once this is cooled, I'll fill quart jars and store in the fridge.
We went to the grocery store early today, so I took the opportunity to prep that cauliflower and mushroom soup before putting all the produce away. I also prepped the half boneless ham for sandwiches by slicing it thin, and used the end to dice for the freezer. I'll use it for split pea soup, or to cook with black eyed peas one day.
I purchased a half turkey breast. All the skin and bones go into my stockpot filled with water, along with some black peppercorns and a couple fresh bay leaves. I'll have about seven or eight quarts of turkey stock to can when it's done. I'll divide the breast, and slice thinly half of it for sandwiches. The rest gets diced for turkey pot pie, or turkey tettrazini.
Friday, November 15, 2013
Bricker and his Cabbage Soup
We used to work on the Orchard Ranch out of Tensleep, Wyoming. When we were there, they had a handyman named Jim Bricker. He was a big bear of a man, and as kind as can be. Always with a twinkle in his eye and ready with his big booming laugh. My boys loved him, and so did we. He had a weiner dog female named Killer that was his constant companion.
Bricker lived on cabbage soup. My friend Amanda reminded me about cabbage soup, and it made me think of Bricker. Built like a brick house, and always healthy. He was a bit windy to be around, so that might have contributed to his good health a bit.
Bricker Soup
1 onion diced
2 T minced garlic
2 T olive oil
big pinch of red pepper flake
whole head of chopped cabbage
bunch of fresh chopped spinach
1 diced zucchini
2 peeled and diced carrots
1/2 C diced celery
1 whole jug v-8
1 quart of diced tomatoes
1 tsp dried basil
1/2 tsp dried thyme
In a large stockpot, brown the onion and garlic in oil with the red pepper flakes. Add the rest of the vegetables and stir until they are opaque. Add the juice, tomatoes and herbs. Bring to a boil and salt and pepper to taste. If you plan on eating, not canning, simmer until vegetables are soft, and serve.
This soup makes a ton, but if you live on it like Bricker did, it will go fast. I will just can this soup in the pressure canner. Yes you can pressure can cabbage. It is a green, and processes for 75 minutes for pints, and ninety for quarts. It is not usually recommended, as it gets strong tasting when canned, but like turnips, and collards, we like them the way they come out, and can them anyway. I use fifteen pounds pressure, but you will need to check the pressure for your own elevation.
Bricker lived on cabbage soup. My friend Amanda reminded me about cabbage soup, and it made me think of Bricker. Built like a brick house, and always healthy. He was a bit windy to be around, so that might have contributed to his good health a bit.
Bricker Soup
1 onion diced
2 T minced garlic
2 T olive oil
big pinch of red pepper flake
whole head of chopped cabbage
bunch of fresh chopped spinach
1 diced zucchini
2 peeled and diced carrots
1/2 C diced celery
1 whole jug v-8
1 quart of diced tomatoes
1 tsp dried basil
1/2 tsp dried thyme
In a large stockpot, brown the onion and garlic in oil with the red pepper flakes. Add the rest of the vegetables and stir until they are opaque. Add the juice, tomatoes and herbs. Bring to a boil and salt and pepper to taste. If you plan on eating, not canning, simmer until vegetables are soft, and serve.
This soup makes a ton, but if you live on it like Bricker did, it will go fast. I will just can this soup in the pressure canner. Yes you can pressure can cabbage. It is a green, and processes for 75 minutes for pints, and ninety for quarts. It is not usually recommended, as it gets strong tasting when canned, but like turnips, and collards, we like them the way they come out, and can them anyway. I use fifteen pounds pressure, but you will need to check the pressure for your own elevation.
Friday, September 13, 2013
Canned Corn, Corn Syrup, Apple Cider, and Apple Juice
The more foods I make for our family rather than buy, the more I find that I can cheaply and easily make at home. I canned corn yesterday. I just canned it plain, and in water, no added salt. I like canning corn. It's easy and straight forward. Shuck the corn, blanch it three minutes, cut it off the cob (my favorite part) and shove it in the jars. When all the corn is shucked, blanched and in the jars, then pour boiling water over it and wipe the rim of the jars. You have to vigorously stir it around with a chopstick to get the air bubbles out, and then you can add a hot lid and ring, and process it. 85 minutes for quarts. From my four dozen ears, I got a thirteen quarts of corn, and a pint to add to the chili that was cooking in the crockpot.
I had done some pints of corn earlier with red and green sweet peppers, celery and vidalia onions. I have about forty pints of this calico corn. So we can have corn with our meals at least once a week for a year, and then some.
So today, I have all these cobs that are left from cutting the corn off. I am going to make corn syrup with them. The season of making candy is approaching, and homemade corn syrup will come in handy! I will use my pressure canner as a pressure cooker and quickly make a bunch of stock from my cobs. In my canner, I'll add the jar rack so the cobs don't scorch to the bottom of the pan. I'll add a dozen or so cobs, whatever will fill the canner about half way. I'll add water to cover the corn, and then put on the lid, and process this stock for twenty minutes at fifteen pounds of pressure. Viola! In half an hour, I'll have loads of corn stock.
Once the canner cools to room pressure, I'll take off the lid, and strain the stock through a cloth lined colander. Now I can measure how much stock I have, and figure out how much sugar to use. For each cup of stock, you will use half a cup of sugar. So, for eight cups of stock, I'll use four cups of sugar. I'll bring this to boil in my stockpot, and let it cook until it's thick and syrup-ey. I'll put it into quart jars, and process in a boiling water bath for ten minutes. Homemade corn syrup can be used in place of store bought syrup in candy making recipes. It can get crystalized, like honey does, and will turn back into syrup if you place the jar in a saucepan with some water, and gently heat it.
Yesterday, Joel and I juiced about three bushels of tart Northern Spy apples. We canned this apple cider in my big half gallon jars. We drink a lot of spiced hot apple cider in the Wintertime. I have an old glass percolator that we use for that purpose. It not only tastes wonderful and warms you up when you are chilled, it makes our house smell like home!
I saved the pulp from the juicer, and will add water to cover that, and cook this to extract the apple juice from it. Once it's simmered about twenty minutes or so, I'll strain it through a cloth lined colander, and bottle it in quart jars. This apple juice processes for five minutes in a boiling water bath.
Once I'm through extracting the juice from this pulp, I'll feed the stuff that I strain out of the juice to the chickens.
This morning, I'm pulling out a fresh tablecloth, and scrubbing my apple sticky floor. When my husband comes home from his trip to Montana today, we'll have a sit down supper with cloth napkins, and the good dishes. I'll put out the jelly into a pretty glass bowl, and pull out some bread and butter pickles, and put them in a refrigerator glass square dish with a pickle serving fork. I'll get out the glass pitcher, and fill it with tea and ice, and warm the rolls to put into a wicker basket with a cloth. I already have these nice things, and they should be enjoyed! It doesn't cost money to live a rich life.
I had done some pints of corn earlier with red and green sweet peppers, celery and vidalia onions. I have about forty pints of this calico corn. So we can have corn with our meals at least once a week for a year, and then some.
So today, I have all these cobs that are left from cutting the corn off. I am going to make corn syrup with them. The season of making candy is approaching, and homemade corn syrup will come in handy! I will use my pressure canner as a pressure cooker and quickly make a bunch of stock from my cobs. In my canner, I'll add the jar rack so the cobs don't scorch to the bottom of the pan. I'll add a dozen or so cobs, whatever will fill the canner about half way. I'll add water to cover the corn, and then put on the lid, and process this stock for twenty minutes at fifteen pounds of pressure. Viola! In half an hour, I'll have loads of corn stock.
Once the canner cools to room pressure, I'll take off the lid, and strain the stock through a cloth lined colander. Now I can measure how much stock I have, and figure out how much sugar to use. For each cup of stock, you will use half a cup of sugar. So, for eight cups of stock, I'll use four cups of sugar. I'll bring this to boil in my stockpot, and let it cook until it's thick and syrup-ey. I'll put it into quart jars, and process in a boiling water bath for ten minutes. Homemade corn syrup can be used in place of store bought syrup in candy making recipes. It can get crystalized, like honey does, and will turn back into syrup if you place the jar in a saucepan with some water, and gently heat it.
Yesterday, Joel and I juiced about three bushels of tart Northern Spy apples. We canned this apple cider in my big half gallon jars. We drink a lot of spiced hot apple cider in the Wintertime. I have an old glass percolator that we use for that purpose. It not only tastes wonderful and warms you up when you are chilled, it makes our house smell like home!
I saved the pulp from the juicer, and will add water to cover that, and cook this to extract the apple juice from it. Once it's simmered about twenty minutes or so, I'll strain it through a cloth lined colander, and bottle it in quart jars. This apple juice processes for five minutes in a boiling water bath.
Once I'm through extracting the juice from this pulp, I'll feed the stuff that I strain out of the juice to the chickens.
This morning, I'm pulling out a fresh tablecloth, and scrubbing my apple sticky floor. When my husband comes home from his trip to Montana today, we'll have a sit down supper with cloth napkins, and the good dishes. I'll put out the jelly into a pretty glass bowl, and pull out some bread and butter pickles, and put them in a refrigerator glass square dish with a pickle serving fork. I'll get out the glass pitcher, and fill it with tea and ice, and warm the rolls to put into a wicker basket with a cloth. I already have these nice things, and they should be enjoyed! It doesn't cost money to live a rich life.
Thursday, November 1, 2012
Halloween Homemade
I *gasp* make homemade treats at Halloween. I only offer them to kids who are with thier parents, and ask if it is OK for their child to have a homemade treat. I have never had someone turn me down. We can't possibly make enough homemade treats for all the kids who come on Halloween, we have several hundred trick or treaters, but I do make some just the same.
I always make homemade hot cider, too. It isn't so much about the drink itself, but it is the smell of the cider that makes it seem like Halloween. I have an old glass stovetop percolator that I fill with cider and add five or six cinnamon sticks, five or six cloves, and five or six allspice berries to it. Once it comes to a simmer, I turn it down on low and leave it on the simmer burner. It is a wonderful welcoming smell for our visitors.
We made Grandma Jenny's caramel corn this year. It is a simple brown sugar caramel poured over popped corn. I added some dried fruits and nuts, and we packaged it in zip lock bags and put a glow in the dark Halloween sticker on it.

Grandma Jenny's Caramel Corn
2 C packed brown sugar
1/2 C water
2 T oil (I used grapeseed oil, but any light oil would do)
Combine all three ingredients in a large saucepan. Don't stir, just put on high heat until it boils. Let the mixture boil for fifteen minutes on high heat, and then pour over corn. Spread out onto nonstick baking sheets to cool and add dried cranberries and pumpkin seeds. After it cools and hardens, bag it up. Grandma Jenny said to use it for a large bag of popped corn. She bought hers already popped, but we popped our own in our Whirlypop. It is a stovetop popcorn popper that has a crank handle on top to keep the corn stirred while it pops. It is great fun to use. I have seen similar models at the Big R store for less than ten dollars. It sure beats having to buy microwave popcorn, and put up with all the salt and preservatives.
We also made caramel apples. I haven't made caramel apples in years. We put one of my glass mixing bowls over a pan of water that was boiling on the stove to heat the caramel. I ended up adding water to the caramels to get them to a consistency that would coat the apples. They sort of slumped, and were too sticky to give out to the kids, so Don will end up taking them to share at work. We had bought some cut little Halloween sprinkles to decorate them in.

I always make homemade hot cider, too. It isn't so much about the drink itself, but it is the smell of the cider that makes it seem like Halloween. I have an old glass stovetop percolator that I fill with cider and add five or six cinnamon sticks, five or six cloves, and five or six allspice berries to it. Once it comes to a simmer, I turn it down on low and leave it on the simmer burner. It is a wonderful welcoming smell for our visitors.
We made Grandma Jenny's caramel corn this year. It is a simple brown sugar caramel poured over popped corn. I added some dried fruits and nuts, and we packaged it in zip lock bags and put a glow in the dark Halloween sticker on it.

Grandma Jenny's Caramel Corn
2 C packed brown sugar
1/2 C water
2 T oil (I used grapeseed oil, but any light oil would do)
Combine all three ingredients in a large saucepan. Don't stir, just put on high heat until it boils. Let the mixture boil for fifteen minutes on high heat, and then pour over corn. Spread out onto nonstick baking sheets to cool and add dried cranberries and pumpkin seeds. After it cools and hardens, bag it up. Grandma Jenny said to use it for a large bag of popped corn. She bought hers already popped, but we popped our own in our Whirlypop. It is a stovetop popcorn popper that has a crank handle on top to keep the corn stirred while it pops. It is great fun to use. I have seen similar models at the Big R store for less than ten dollars. It sure beats having to buy microwave popcorn, and put up with all the salt and preservatives.
We also made caramel apples. I haven't made caramel apples in years. We put one of my glass mixing bowls over a pan of water that was boiling on the stove to heat the caramel. I ended up adding water to the caramels to get them to a consistency that would coat the apples. They sort of slumped, and were too sticky to give out to the kids, so Don will end up taking them to share at work. We had bought some cut little Halloween sprinkles to decorate them in.

Sunday, October 14, 2012

So here it is, my pantry. Don calls our pantry the vault. It is a good description, because we have a lot invested in it. Besides the investment in food that will cost me the same to serve six months from now, as it did the day I grew it or canned it, we have a large investment in time. Time to provide for ourselves healthy nutritious food with no preservatives or added salt, and time to preserve the traditions that made the homesteader's and pioneers thrive! It is a proud tradition, and I am proud of the vault. I have canned more than I ever have in my life this year, and have learned so many new things!

Sunday, October 7, 2012
Making Tomatillo Apple Salsa
I am still cannning like a madwoman trying to get the garden all put by. Counting down the crops until they are all either in the freezer, or the new dehydrator, or in jars in my pantry. So here is the process for tomatillo salsa. Tomatillos are a gooseberry relative, and makes it's contribution to the culinary world mainly as salsa and a sauce called salsa verde that is used in green chile, posole and other Mexican food delights.
I am making both tomatillo salsa and salsa verde today. The tomatillo salsa is a water bath canning method recipe, and the salsa verde requires a pressure canner, because it contains chicken stock.
When we harvested the four tomatillo plants, we came up with three flats of tomatillos. To use them, the papery husk must be removed. Here is a photo of the tomatillos in the sink full of cold water. Besides being enclosed in a husk, they are sticky little buggers, so water is a must.
 So here they are, Some of them are dinky, and some didn't fill out their little papery husks, but trust me, they will all be delicious! It takes a little time to get them all ready for using, but they are worth it. We buy canned tomatillos, and use them for posole mostly. It is a delicious pork stew with hominy and green chiles. The tomatillos make a wonderful tangy broth to simmer the meat in.
After you are all done de-husking, you should rinse the fruits in cold water again. Like I said before, these little buggers are sticky.
For my canning today, I used the recipe from the Better Homes and Gardens' book You Can Can. It interested me because it added apples to the tomatillo salsa, and I had lots of apples that needed used. The recipe called for a Granny Smith apple, but I used MacIntosh, because that's what we had on hand. Here is what they look like when you get them all cleaned.

Pretty huh? So I used my food processor to pulse/chop the tomatillos. Also the onions, the jalapenos, and the peppers. It is just easier, and my chopping thumb is still sore from the tomatoes I canned diced last week! I am cooking my salsa in the oven in my huge roaster pan. I am a notorious scorcher, so I am taking no chances of ruining all my hard work. The salsa will come to a boil and simmer in the oven before I can it in the water bath canner. I have about eighteen pints of salsa in the roaster. Here's what it looks like, and may I just say, it tastes delicious.

I am making both tomatillo salsa and salsa verde today. The tomatillo salsa is a water bath canning method recipe, and the salsa verde requires a pressure canner, because it contains chicken stock.
When we harvested the four tomatillo plants, we came up with three flats of tomatillos. To use them, the papery husk must be removed. Here is a photo of the tomatillos in the sink full of cold water. Besides being enclosed in a husk, they are sticky little buggers, so water is a must.

After you are all done de-husking, you should rinse the fruits in cold water again. Like I said before, these little buggers are sticky.
For my canning today, I used the recipe from the Better Homes and Gardens' book You Can Can. It interested me because it added apples to the tomatillo salsa, and I had lots of apples that needed used. The recipe called for a Granny Smith apple, but I used MacIntosh, because that's what we had on hand. Here is what they look like when you get them all cleaned.

Pretty huh? So I used my food processor to pulse/chop the tomatillos. Also the onions, the jalapenos, and the peppers. It is just easier, and my chopping thumb is still sore from the tomatoes I canned diced last week! I am cooking my salsa in the oven in my huge roaster pan. I am a notorious scorcher, so I am taking no chances of ruining all my hard work. The salsa will come to a boil and simmer in the oven before I can it in the water bath canner. I have about eighteen pints of salsa in the roaster. Here's what it looks like, and may I just say, it tastes delicious.

Wednesday, August 22, 2012
Fast food, Country Style

Well, I am still in the canning "weeds" as it were, and am canning almost every single day, if not doing the prep and soaking portions of the canning process. Besides sixty pounds of tomatoes, today I have a canner load (eight quarts) of chicken stock that I need to do something with. I can't decide if I want to make: chicken soup or just can the broth. I am leaning towards the soup, even though it requires more effort and processing time.
A quart of chicken soup is a platform for so much yumminess you can't even imagine! My husband likes me to add chopped cabbage and ramen noodles (the real noodles, not the soup mix) to it. The day care babies like it that way too. I can put dried mushrooms and rice, or frozen tortellini and spinach, or add a C of buttermilk mixed with a couple of T of cornstarch to thicken it, and finish with a C of cream for cream of chicken soup. I can add tomato paste, roasted green chiles, some roasted garlic and thicken it with masa for a terrific chicken enchilada soup. It is our fast food of choice, so I guess I'll make more while I can.
That is the wonderful thing about home canning. I have a whole shelf to choose from full of fast food. I can pour out a jar of Chicken Cacciatore, and boil some noodles, and have supper in less than twenty minutes. I can start a gravy in the pan, with butter and flour cooking together, add the liquid from the canned pork loin chops, and some buttermilk to make a killer pork gravy, to which I'll add the pork loin chops in to warm. Less than fifteen minutes, and I have hot pork sandwiches on the table. In the time it takes to boil the egg noodles, my hamburger stroganoff gets heated and sour cream added for another fast food meal. There are the ultra fast pea and ham and bean soups, the chicken enchilada soup, the tomato bisque soup, all right there, homemade and seasoned to please our own pallets and accommodate my dietary restrictions.
We bought a new car this last month. My old Sable was pretty sad. The paint job that they put on vehicles in the nineties didn't last, and the windshield was going to cost more than the car was worth. We got a beautiful used Lincoln Town Car, with all the bells and whistles. We learned a long time ago, that it's better to buy the best used car you can find than to buy new. I could never have afforded this car new, but it is like new still. It even smells like a new car inside. That beautiful smell of new plastic and leather. I bet no one has worn their poopy chore boots in it ever. Not that they will get the chance to now either, it is kind of MY car, and hopefully, I'll not be warming any newborn lambs, or hauling feed in it like my last car. That's what I keep telling myself anyway.
There is great joy in driving a big Lincoln. It is like riding a marshmallow down the road. It has dual controls for the air conditioning, which should improve my marriage. The only thing we really ever fight over is the temperature. I'm a hot momma, and Don is always cold. He actually wears a t shirt under his shirt 365 days a year! He says it causes evaporative cooling in the summer.
Tuesday, August 7, 2012
No Salt No Sugar Bread and Butter Pickles
I do a lot of home canning, but this is a project everyone can try. It is a project for the fridge, so there is no canning involved. It does help, however, if you have a canning jar to pack them into, but it is certainly ok to use another similar sized vessel.
I just harvested the first of the cucumbers from my garden, and this is how I used them. We have had to do several things to prevent the deer from eating our plants and fruit. The last of which was an electric fence around the top of the fence. It seems to be working so far, so maybe I'll actually get a harvest out of all my labors!

You will note, the jar is not totally full of pickles. We had some quality control checks before I took the picture.
I just harvested the first of the cucumbers from my garden, and this is how I used them. We have had to do several things to prevent the deer from eating our plants and fruit. The last of which was an electric fence around the top of the fence. It seems to be working so far, so maybe I'll actually get a harvest out of all my labors!

You will note, the jar is not totally full of pickles. We had some quality control checks before I took the picture.
No Salt No Sugar Bread and Butter Pickles
for the fridge
5-6 pickling cucumbers, sliced in 1/4 inch rounds
2 C white vinegar
11/2 C stevia in the raw
1/4 tsp turmeric
1/4 tsp celery seeds
1/4 tsp mustard seeds
pinch of red pepper flakes, or a squirt or two of tabasco
1/4 tsp pickle crisp
Slice cucumbers and pack into a quart jar. Add pickle crisp to the jar. In a small saucepan, heat the vinegar, stevia, turmeric, celery, mustard, and red pepper flakes until boiling. Pour over pickles. Remove bubbles by running a chopstick down into the jar to release them. Let cool. Refrigerate for 48 hours, or until colored all the way through.
These pickles have 2 calories per serving, for six or seven pickles, and one g carb, no fat and no protien.
Thursday, July 26, 2012
Blueberry Apple Pie

I love to make pie. We recently had some nice blueberries for pie, and when I went to make it, the two clamshells of berries just didn't look like enough to make a properly filled pie. My definition of properly filled is so much filling you couldn't cram another berry in there. So, I peeled the three Granny Smith apples that were in the fruit bowl and added them too. It turned out really good, and I got requests to make it that way again soon!
When I was putting this together, I got distracted a few times. Because of my distracted state, I forgot to put the butter pats over the fruit before putting on the top crust. I remembered about the time I got it all crimped. So this accounts for the gaping hole in the top. Actually, it worked out well; I got the butter put in the gaping hole, and it didn't drool all over my oven because the hole prevented it from doing that too!
I used store bought crust. The last homemade crust I did was an all butter thing, and it was tough as shoe leather, so why reinvent the wheel? I went back to what works.
Blueberry Apple Pie
2 pints fresh blueberries
3 Granny Smith apples peeled and sliced thinly
1 tsp cinnamon
1 C sugar
1/4 C flour
1/2 stick butter cut into little pieces and dotted over the pie (hopefully before you put the top crust on hehe)
Mix above ingredients. Pour into bottom pie crust, and top with top crust. Wet the edge of the bottom crust, and crimp to seal. Decorate the top with a couple slashes, and a fork to release steam. Place filled pie on a cookie sheet lined with foil (I forgot the foil last time and had to buy a new cookie sheet. After an hour, the burnt fruit syrup is not going to come off! Bake at 400*F for an hour.
Sunday, July 22, 2012
My Grandma's Plums

I canned plums today. It is a trip into my childhood and food is the vehicle that takes me there.
My Grandparents were homesteaders on Buckhorn Flatts near Riverton Wyoming. They ran some cattle, raised sugarbeets, ran the beet dump, and had a dairy. When I was little, I loved to be at Pappa Hinkle's house. The men would come into Grandma's kitchen after milking, and have coffee. They ate their lunch around that table, and talked of all things. There was humor and love always in that house. We ate cottage cheese with syrup, and tomatoes with sugar sprinkled on them, and these wonderful canned plums. Sitting there next to the white built in china cabinet, and looking out the window that overlooked the chicken house, which I had a fascination for, I always felt at home and content.
I loved my Grandmother's canned plums. Their tart and tangy sweetness is just one of those things that tastes like nothing else. The smell of the syrup alone is one of those things that makes you pause, and inhale deeply, exhaling with the word Aaaahhhh. They should be served ice cold, or thickened in a pie.
Now that I am grown and can my own fruit, I find that plums are my favorite to can. They are so simple. Just cut them in half and pour over a light syrup made from 8 C water, and 2 C sugar boiled together. Then process in a boiling water bath for twenty minutes for pints like these pictured above, or 25 minutes for quarts. No treating with fruit fresh, or peeling off skins, just plunk them in the jars and away we go!
Thursday, July 12, 2012
Jalapeno Cranberry Poppers with Bacon
 |
| Note the pie in the background: Apple blueberry pie. Look for it in the next post! |
My little kids all went home yesterday before five, but I had two meals worth of dishes to get cleaned up before supper. I just had one of those days when you know if you head to the kitchen to wash dishes while the kids are playing there is going to be trouble! It is an understatement to say that the natives were restless yesterday. They had been on holiday the week before, so it takes a few days to get back in the groove again of getting along with others, and following Tina's rules.
I was surprisingly in good shape at the end of the workday, though, and had a good visit with my husband as I cleaned up the mess, and put the chicken in the marinade for the grill. He decided to go ride his colt at the farm lease, so I had a pocket of time before I had to have the meal on the table.
It is just a pleasure at times to cook a meal without being hurried along. The temperature had cooled considerably, and I started pulling out vegetables and fruits to make a plan. I had chicken thighs ready, and put them in a zip lock bag with 1/2 cup fresh lemon juice, and a packet of Weber's Just Add Juice marinade (which is delicious by the way). I had white potatoes to use up, and planned to make mashed potatoes to go along with the grilled chicken. Past that, I really didn't have a plan, and because it is coming up on my shopping day, I really need to use some things up.
I found a good bunch of jalapenos that needed used up. They were left over from making pickled vegetables. We like poppers, but make baked ones instead of frying them. In this recipe, the health benefits of doing that are negated by the addition of a big ole piece of bacon on top, but they are a special treat. The play of the sweet and tangy cheese and cranberries against the hot pepper and the salty bacon is heavenly.
Jalapeno Cranberry Poppers with Bacon
10-12 jalapenos halved longways, seeds and ribs removed
1/2 C ricotta cheese
1/2 C cream cheese
1 C chopped dried cranberries
Bacon cut into jalapeno sized lengths
Fresh ground pepper
In a medium sized bowl, combine the cheeses and chopped cranberries. Fill jalapeno halves level, and place them on a cooling rack placed in a baking sheet. Top with a piece of bacon, and season with fresh ground black pepper. Bake at 450*F until bacon is crispy and peppers are soft, about twenty minutes at my altitude. Serve either warm or at room temperature.
Tuesday, May 29, 2012
Fennel and Orange Slaw with Mint

We have been eating lots of fresh fruits and vegetables lately. We adore fennel, and when we can get good fresh fennel, we buy it up to make poached fish, or to put into soups.
If you have never had fresh fennel bulb, you are in for a treat. It is similar to celery in texture, but has a mild licorice flavor to it. It is great fresh, or roasted, or in soups. The fronds are pretty, and although I doubt that they add much in the way of nutrition, I always chop up a few and add them in any fennel dish.
We are avid participators in the Bountiful Basket program. It is a volunteer food cooperative, and offers fresh food at low prices. We just got our Bountiful Basket for the week, so I needed to make room for all the new fresh goodies that came in our basket, I scoured through my full bins for things to use up, and this is the salad that was created, in honor of that delicious Cambodian slaw.
Fennel and Orange Slaw
3 fennel bulbs, cored and sliced thinly
3 oranges, royaled*
1 English cucumber sliced
1/4 C fresh mint leaves
reserved orange juice
1 tsp red wine vinegar
1 tsp olive oil
fennel fronds for garnish
Cut the fronds and core end off of the fennel bulb, and cut it in half lengthwise. Cut out the tough core, and slice in half moon shaped thin slices, and place in a large salad bowl. Add all remaining ingredients and toss to coat. Season with salt and pepper to taste. This is great served with roasted pork, or would be an awesome picnic salad. It's very fresh, and low calorie.
*A royaled orange: Cut both ends off of an unpeeled orange. Then standing the orange on the cut surface, you can remove the peel and pith from the orange. With a paring knife, cut the orange slices out keeping close to the membranes. When all the slices are liberated, squeeze the orange juice out of the orange "guts" and into a bowl to use for the dressing.
Royaling fruit is a great method. I use it to add citrus to salads. If the citrus in my fruit bowl on the kitchen table starts to look a little soft, I will royal all the fruit, and put it and the juice into a canning jars to put in the fridge. It's amazing how quickly that cold fruit gets used up once I do that!
Friday, May 25, 2012
Making Chicken Stock Second Method
If you've read my blog before, you know that I use rotisserie chicken from the store often. I figure if they can roast it for me for the same price as a raw chicken, I will let them. I will let you in on another little secret: I have an aversion to raw poultry. It grosses me out! I hate the smell, and the feel of it. I really hate it when it's not cleaned good, and you have to pull the pin feathers, or clean leftover guts out of the body cavity. I have a hard time eating chicken after handling it raw, it just bothers me. So, I buy it warm and roasted and smelling delicious from the store. There, I've admitted it!
After I pick all the meat off of the chicken, I put the skin and bones in a zip lock bag, and it goes in my freezer. That way, when it is a cold day, or I am bored, I can pull it out and make stock. I had three bags full of chicken bones, and I put them in my big 15 quart stock pot. I filled it up to about two thirds, and added a handful of black peppercorns, and about 5 small bay leaves. Because the chicken was seasoned before being roasted, this will have a slightly different flavor than the stock I made in the previous post. It is made from roasted meat, so it will have a darker color than stock made from poached chicken.
I clamp a lid on the pot, and put it on my simmer burner to cook there all day. It takes all day to get it to that fall apart stage, where the meat and gelatin have all been gleaned from the bones and skin. After it is done to that stage, I pour it through a colander into another huge stock pot. All of the bones and skin and little bits of meat have given their all to the stock, and along with the peppercorns and bay leaves, it goes in the trash. Now I have a huge pot of stock at my disposal. I usually put it into canning jars, leaving 1 1/2 to 2 inch headspace, and just freeze it using a plastic lid made to fit canning jars. I am at a limit to my freezer space, so this time I will can it.
When canning any low acid food, such as meat stock, you need to use a pressure canner. Be sure to follow the directions from the manufacturer of your canner, and use the recipe guidelines from a reliable source, such as Ball Blue Book, or Kerr Canning Guides. You can get recipes online, but be aware that not all sources are reliable.
.JPG) So, I used the parts that would have gotten thrown away normally, and made seven glorious jars of stock. It is more flavorful than the stock in a box, and if you figure in the cost of the seasoning, and the jar lid, it still costs only pennies to make!
So, I used the parts that would have gotten thrown away normally, and made seven glorious jars of stock. It is more flavorful than the stock in a box, and if you figure in the cost of the seasoning, and the jar lid, it still costs only pennies to make!
After I pick all the meat off of the chicken, I put the skin and bones in a zip lock bag, and it goes in my freezer. That way, when it is a cold day, or I am bored, I can pull it out and make stock. I had three bags full of chicken bones, and I put them in my big 15 quart stock pot. I filled it up to about two thirds, and added a handful of black peppercorns, and about 5 small bay leaves. Because the chicken was seasoned before being roasted, this will have a slightly different flavor than the stock I made in the previous post. It is made from roasted meat, so it will have a darker color than stock made from poached chicken.
I clamp a lid on the pot, and put it on my simmer burner to cook there all day. It takes all day to get it to that fall apart stage, where the meat and gelatin have all been gleaned from the bones and skin. After it is done to that stage, I pour it through a colander into another huge stock pot. All of the bones and skin and little bits of meat have given their all to the stock, and along with the peppercorns and bay leaves, it goes in the trash. Now I have a huge pot of stock at my disposal. I usually put it into canning jars, leaving 1 1/2 to 2 inch headspace, and just freeze it using a plastic lid made to fit canning jars. I am at a limit to my freezer space, so this time I will can it.
When canning any low acid food, such as meat stock, you need to use a pressure canner. Be sure to follow the directions from the manufacturer of your canner, and use the recipe guidelines from a reliable source, such as Ball Blue Book, or Kerr Canning Guides. You can get recipes online, but be aware that not all sources are reliable.
.JPG)
Wednesday, May 23, 2012
Canning Chicken, Making Chicken Stock I
Chicken has been an incredible value this week. I found chicken breast for $.99 and I stocked up on leg quarters for $.89 a month or so ago. In the next few posts, I will show three different methods for making chicken stock, and soup. I am making a chicken soup base today, but I will also be making a Chicken Cacciatore, and possibly a White Chicken Chili if I have enough chicken and stock.
Now, I know that chicken stock is readily available, and of high quality, but it is extremely easy to make your own, and costs just pennies a jar. Once you start making your own, you'll never go back to store bought. There is a depth of flavor, that you just can't buy in a box.
I recently got a new 8 quart pressure canner/cooker, and the method I'm showing you today is made easier by using my pressure cooker to make the stock. I could most certainly make it by simmering it slowly all day in a stock pot, and I'll show you that method next time, but it took less than an hour to get the chicken to that fall apart state needed for stock making. I'll be using this method far more often than the cooking all day one to be sure.
I make my stock using no added salt, but you could certainly use salt in yours. Just be sure if you plan on canning the stock instead of freezing it that you use canning and pickling salt, not table salt. Iodized salt and canning don't mix.
So I started this batch of Chicken Soup Base with a package of leg quarters. The dark meat in legs and thighs makes a superior stock in my opinion, but I also make stock from breasts. The color will be a lighter lemon yellow versus a more orange brown that you get from the dark meat.
 This package of meat was 5 pounds, and it was $.89/pound. I had purchased it a while back, and stored it in the freezer for stock making day.
After browning the leg quarters well in a couple T of olive oil, I removed the chicken and placed the jar rack back in the cooker with the chicken on top of it. This elevates the meat, while still circulating the liquid, and keeps the chicken from sticking to the bottom of the pot. Then I added 6 quarts of water, a handful of peppercorns, and about four small bay leaves. That is all. You will be amazed at the flavor this will render. This processed for 35 minutes at 10 pounds of pressure. I let the cooker sit for five minutes off of the heat, and then ran cold water over it in the sink, and removed the weighted gauge before opening it. Note that this method is only used when cooking in the pressure cooker, and never when it is being used as a canner.
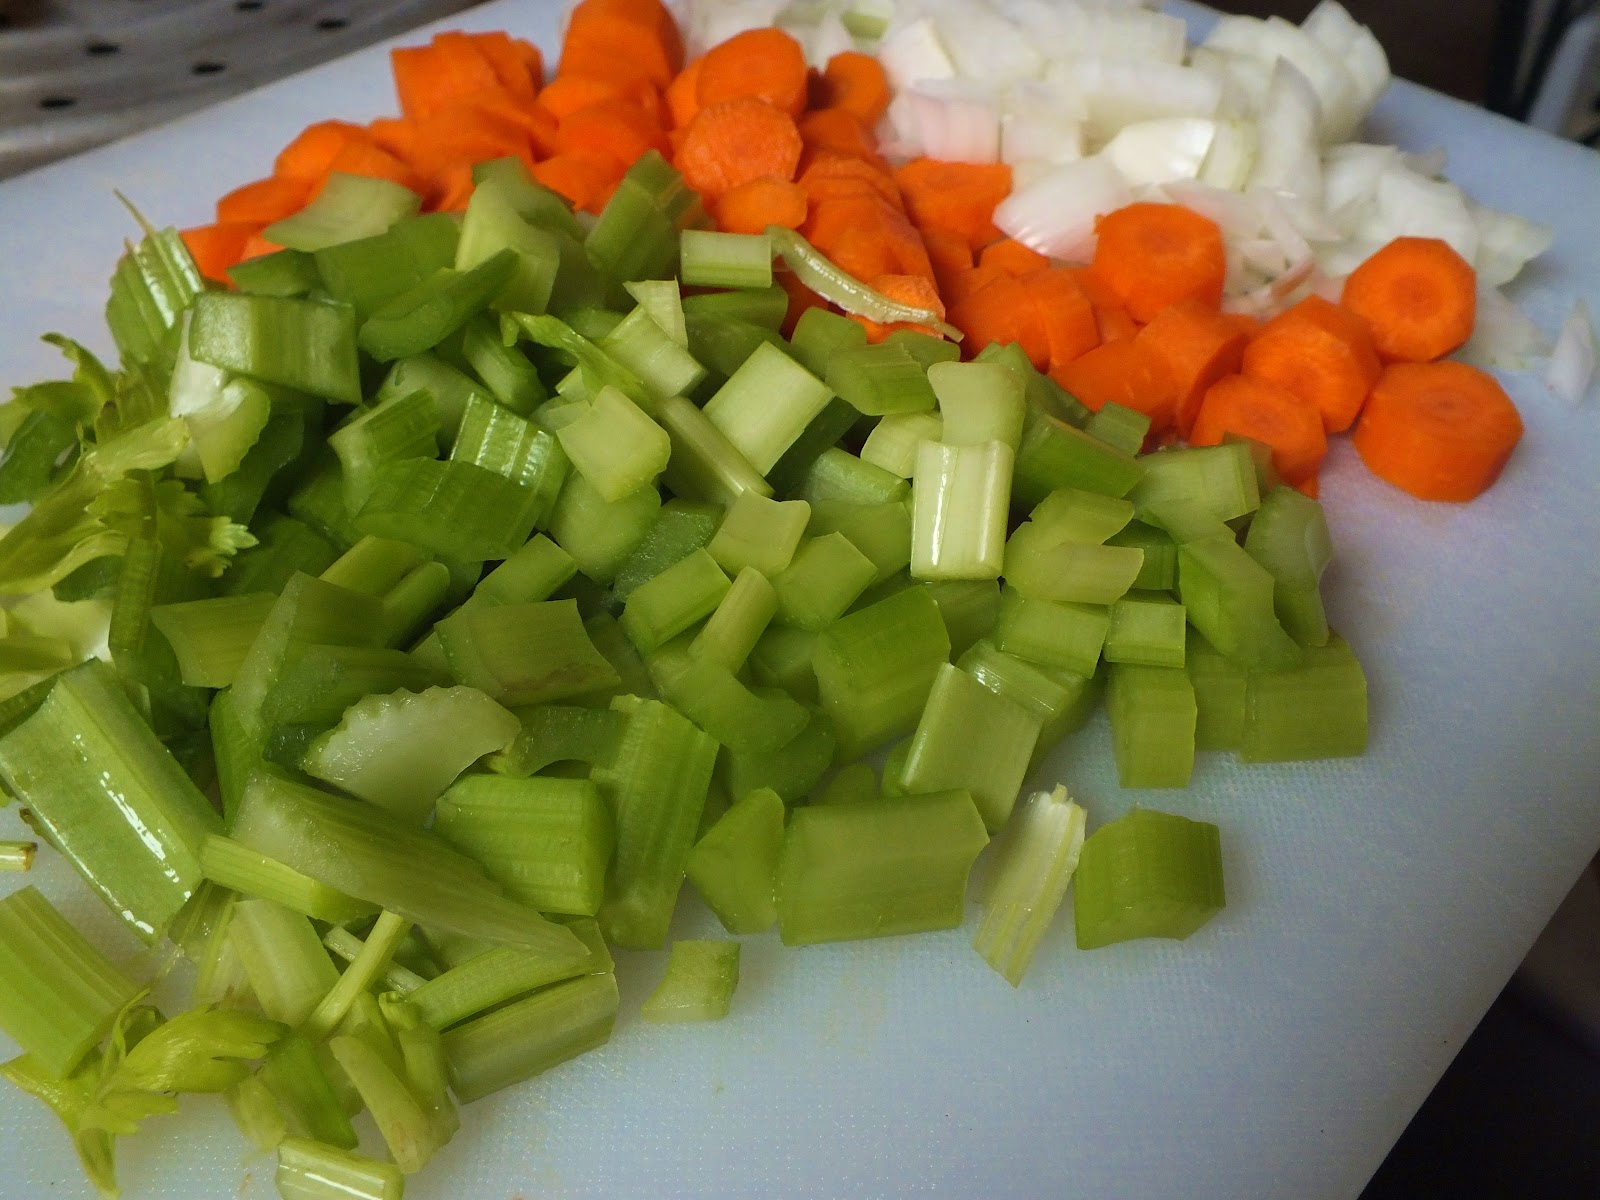
 Now it is just a matter of picking the meat off of the chicken, and straining the stock. To the hot clean jars, I added carrots onions and celery, along with the meat from the leg quarters. I don't fill the jars more than half way, so that there is plenty of stock to cook homemade noodles, or spaetzle, or dumplings in when I heat it up to serve it.
 While I was filling the jars, I have a stockpot full of the chicken stock on to boil, and I've added the proper amount of water to my pressure canner, and the jar rack, and have that on the stove also. I have put my lids and rings together, and they are waiting in hot water for when I need them. If the lids are kept hot, the rubber will have a better chance to seal. I'll drain off the water at the last minute, and have them handy.
Now the chicken stock is boiling, I take great care to ladle the hot broth into the jars, leaving a 1 inch headspace. After the jars sit for a couple minutes, I will skim off the fat at the top, and add enough broth to come up to the 1 inch headspace amount again. With a clean towel that has been soaked in hot water and a little vinegar and rung out, I carefully wipe the rims of the jars, and place the lids and rings on. Working with a towel over my hand, because the jars are extremely hot, I screw the lids down tight and carefully place them down in the pressure canner. The canner lid goes on and the weight, and they process for 1 hour and 30 minutes at 15 pounds of pressure. After processing, I will let the canner come back to normal pressure before I remove the weight, and set them on a towel to cool. I like to remove the rings and wash the jars after pressure processing. They leak a small amount of liquid, and should be cleaned before storage.
I prefer to store the rings back on the jar. I am careful to place them on loosely, so I don't disturb the seal of the jar. I don't like to have to keep all those rings elsewhere, and I feel it helps protect the jar rim if it should get bumped around. Once they are chipped, they are no good for canning.
So, here is the finished product. The package of three leg quarters made 8 quarts of chicken soup base. Figuring in the vegetables and the herbs and spices, and also the lids, it still only comes to $.89 cents a quart jar. It is so worth the time and effort!

Now, I know that chicken stock is readily available, and of high quality, but it is extremely easy to make your own, and costs just pennies a jar. Once you start making your own, you'll never go back to store bought. There is a depth of flavor, that you just can't buy in a box.
I recently got a new 8 quart pressure canner/cooker, and the method I'm showing you today is made easier by using my pressure cooker to make the stock. I could most certainly make it by simmering it slowly all day in a stock pot, and I'll show you that method next time, but it took less than an hour to get the chicken to that fall apart state needed for stock making. I'll be using this method far more often than the cooking all day one to be sure.
I make my stock using no added salt, but you could certainly use salt in yours. Just be sure if you plan on canning the stock instead of freezing it that you use canning and pickling salt, not table salt. Iodized salt and canning don't mix.
So I started this batch of Chicken Soup Base with a package of leg quarters. The dark meat in legs and thighs makes a superior stock in my opinion, but I also make stock from breasts. The color will be a lighter lemon yellow versus a more orange brown that you get from the dark meat.

After browning the leg quarters well in a couple T of olive oil, I removed the chicken and placed the jar rack back in the cooker with the chicken on top of it. This elevates the meat, while still circulating the liquid, and keeps the chicken from sticking to the bottom of the pot. Then I added 6 quarts of water, a handful of peppercorns, and about four small bay leaves. That is all. You will be amazed at the flavor this will render. This processed for 35 minutes at 10 pounds of pressure. I let the cooker sit for five minutes off of the heat, and then ran cold water over it in the sink, and removed the weighted gauge before opening it. Note that this method is only used when cooking in the pressure cooker, and never when it is being used as a canner.

Now the chicken stock is boiling, I take great care to ladle the hot broth into the jars, leaving a 1 inch headspace. After the jars sit for a couple minutes, I will skim off the fat at the top, and add enough broth to come up to the 1 inch headspace amount again. With a clean towel that has been soaked in hot water and a little vinegar and rung out, I carefully wipe the rims of the jars, and place the lids and rings on. Working with a towel over my hand, because the jars are extremely hot, I screw the lids down tight and carefully place them down in the pressure canner. The canner lid goes on and the weight, and they process for 1 hour and 30 minutes at 15 pounds of pressure. After processing, I will let the canner come back to normal pressure before I remove the weight, and set them on a towel to cool. I like to remove the rings and wash the jars after pressure processing. They leak a small amount of liquid, and should be cleaned before storage.
I prefer to store the rings back on the jar. I am careful to place them on loosely, so I don't disturb the seal of the jar. I don't like to have to keep all those rings elsewhere, and I feel it helps protect the jar rim if it should get bumped around. Once they are chipped, they are no good for canning.
So, here is the finished product. The package of three leg quarters made 8 quarts of chicken soup base. Figuring in the vegetables and the herbs and spices, and also the lids, it still only comes to $.89 cents a quart jar. It is so worth the time and effort!


Snap Peas were a good value at the store this week. Also vine ripened tomatoes, so I made this fresh salad for lunch today:
1 C Snap Peas cut in half
3 vine ripened tomatoes cut in wedges
1 C Carrots peeled and sliced on the mandolin
1/2 Red Onion sliced thin
1/2 C Feta Cheese
1/4 C Red Wine Vinegar
1/2 t Mrs. Dash onion and herb seasoning
1/8 t tajin seasoning
drizzle olive oil
you can find tajin seasoning in the produce section, it is a latin flavoring for fruit, and adds a tangy citrus flavor.
Monday, May 21, 2012
Turkey International: Hungarian Turkey and Cabbage Casserole, Dutch Turkey Waldorf Salad
It is a challenge to come up with new recipes for turkey, as we eat it often due to my dietary restrictions. You can only eat so many plain turkey sandwiches before it becomes boring. If it were colder out, I would get out a whole turkey from the freezer. I stockpiled several last Thanksgiving time. The thought of roasting a whole bird for most of a morning in my already hot kitchen is almost more than I can stand. So, I rely on the roasted turkey breast that they sell in our local grocery store. I carefully pull the whole breast off the bones, and put the bones and bits of meat still clinging on, along with the skin, in a stockpot to boil away while I finish the rest of my turbo cooking for the week.
I deli slice half of one whole breast for sandwiches, and put it in a tupperware in the meat drawer. I will add a couple teaspoons of the broth made from the bones to the meat to make sure it makes a moist and tender meat sandwich. This is a good tip for any kind of roasted meat that you are going to use for sandwiches. The other half gets diced for the Hungarian Turkey and Cabbage Casserole. The other breast gets divided: 4 cups get diced for the Waldorf Salad, and the rest shredded to make homemade turkey and noodles on Thursday.
So, for my twelve dollars of already prepared meat, I have four meals plus leftovers. Three dollars a meal! Not a bad meat choice for our tight budget.
We love cabbage in any preparation in our house, either cooked or raw, or as sauerkraut. This is a variation on a traditional Hungarian side dish. It is simply shredded cabbage cooked in butter and added to cooked noodles. I have adapted it to include mushrooms and onions and leftover meat. It is good with turkey, but you could also use diced beef roast, or pork.
Hungarian Turkey and Cabbage Casserole
6 T butter divided
1 diced onion
2 C mushrooms sliced
1/2 head shredded cabbage
1 qt/box chicken or turkey stock
1 C diced turkey
1 tsp caraway seeds
1 C milk
2 T cornstarch
Salt and Pepper to taste
1 box cooked and drained short cut pasta like shells
In a large dutch oven or chicken cooker skillet, sweat the onion and mushrooms until onions are translucent in 3 T butter. Add shredded cabbage, and stir until it starts to wilt. Add caraway and stock. Bring to a boil. Season to taste with salt and pepper. In a measuring cup blend the milk with the cornstarch until it is dissolved. Stir into boiling stock until it thickens. Stir in the remaining 3 T butter to finish the sauce, and pour over cooked pasta.
At this point, you can cool and store it to heat in the oven later in the week at 350*F until bubbly.
Turkey makes a wonderful Waldorf type salad. I use apples and dried fruits and toasted nuts in it. My daycare kids love it.
Turkey Waldorf Salad
4 C diced turkey
1/2 minced onion
1 C celery diced
1/2 C chopped dried cherries
2 apples cored and chopped (anything you like, I used a tart pink lady apple)
1/4 C chopped toasted nuts
Toss all ingredients in a large bowl, and top with dressing:
juice and zest from 1 lemon
1/2 C Greek yogurt
1/4 C orange juice
1/2 T orange zest
1 tsp sugar or stevia, or to taste
1/2 tsp cardamom
Subscribe to:
Posts (Atom)